My Girl: Gettin' After It!!

My Girl: Gettin' After It!!
My truck on her maiden voyage in Moab 2012

Tuesday, November 13, 2012

Day 2- 11/13/12

I'm now safely back home and the Mrs is in Philly. On the last trip, I blogged at night as there was not much else to do on the road alone. For this trip, I was with my wife whom I do not see on a regular basis; so, we spent our time going to entertainment and having meals together. Really mundane things until you consider the professional separation. That being said, my updates are now occurring after the fact. I'll have to figure out a way to accomplish both (although Jenn has indicated she does not wish to again spend that much time inside the cab of any vehicle anytime soon).

So we begin now with Day 2 photos and captions.


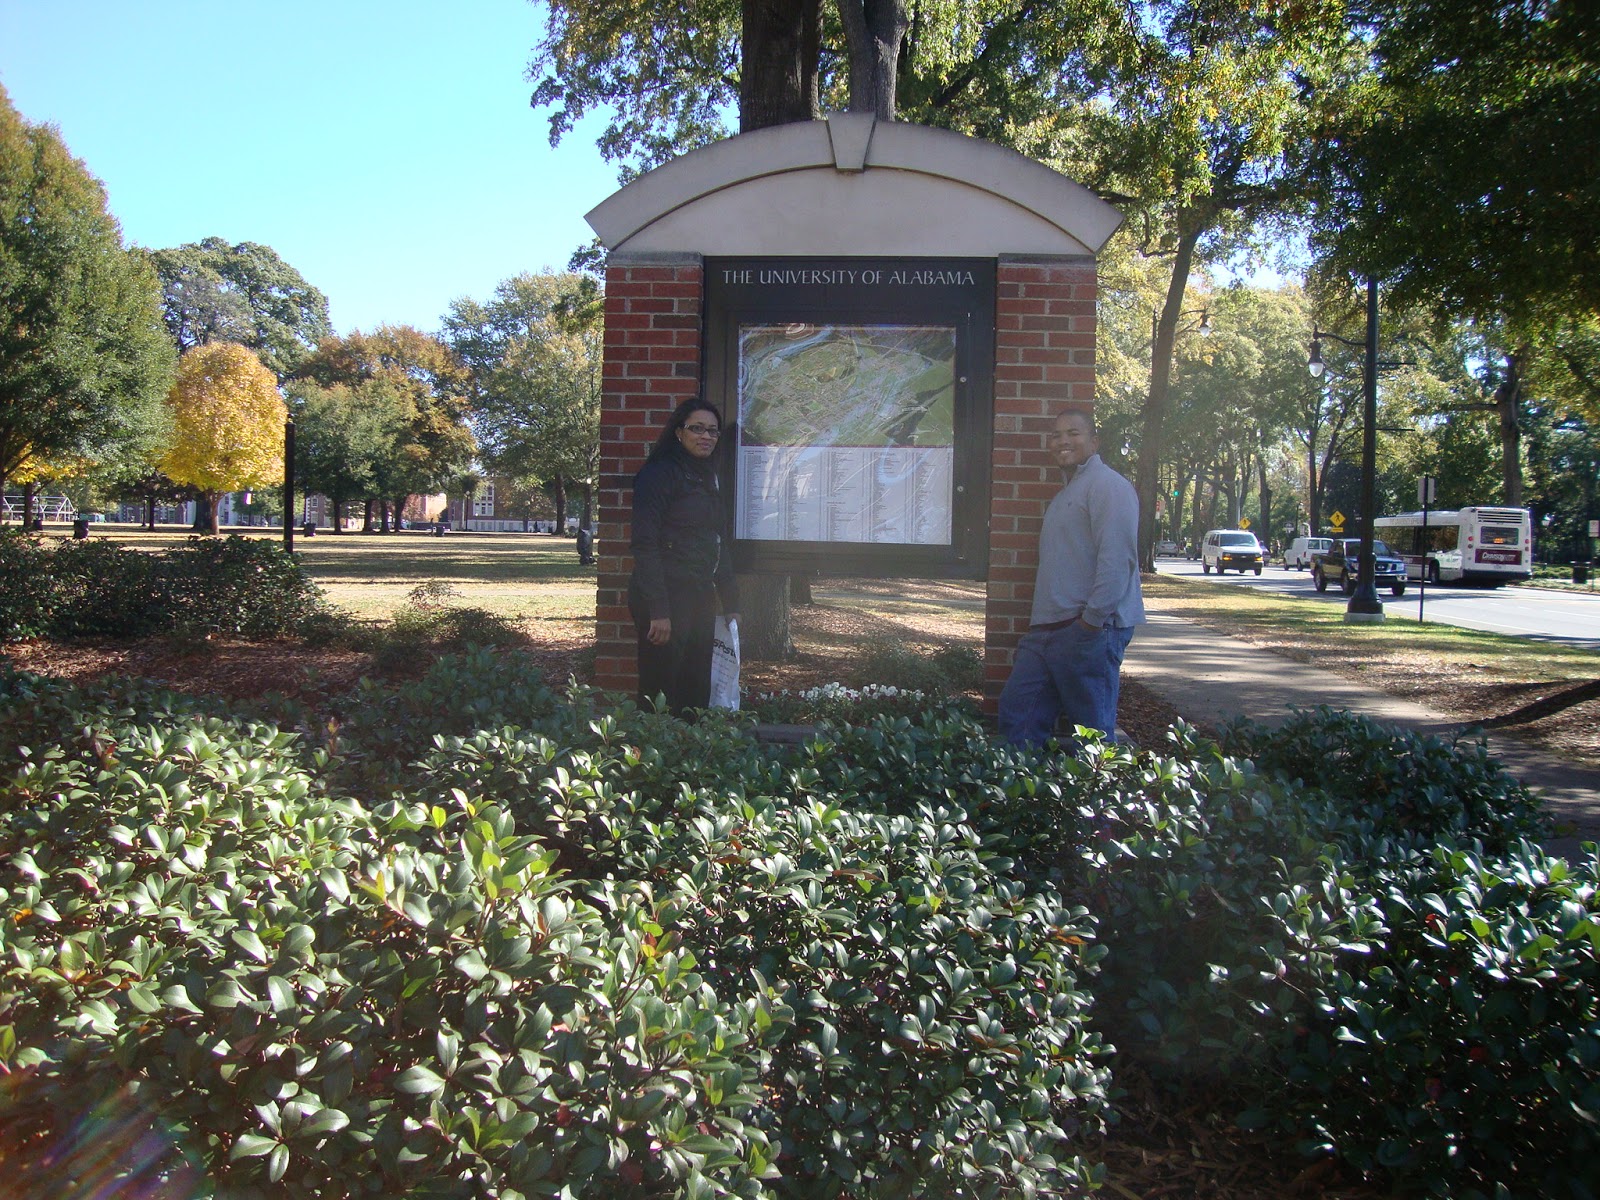
 I had hoped we would make it to Tuscaloosa by the conclusion of Day1, but that was a bit ambitious given just how long it takes to drive south through Virginia alone. We did make it to Alabama, but not quite far enough. We were about an hour or so from Tuscaloosa. After resting up, we did make it to campus. This is the truck parked at the backside of the stadium.
 I don't like to take pictures of just inanimate objects or things (unless we are talking about the truck, in which case I take plenty); so, I was asking Jenn to stand in front of various things and point to them. I just like a picture better when there's a person in them. Ordinarily, my wife does not just go around pointing at things. In fact, it took a fair amount of imploring on my part to get her to humor me on this trip.
 Sometimes we get passers-by to take the photos; other times I can find something nearby of appropriate height and just set the timer. It was a lot better having a companion on this trip. We made it to the bookstore, but unfortunately there were no Cheerleading T-shirts. In fact, aside from Virginia Tech, this would prove to be the theme for the entire trip.
 We got the Mississippi crossing. You can see the top of the Farmers Jack mounted to the hood in this shot, as I had the camera perched on top of it to get both of us in the shot.


This trip marked the debut of the swing-out tire carrier. I literally finished it the day before the trip. The paint job had time to cure overnight. I was mounting the license plate and figuring out how to strap down the jerry cans 10 minutes before departure on Day 1. I modified the ratchet tie-down positioning somewhere in Mississippi as I noticed one of the anchor points deflected some when I really cranked down on it. The cans are worth considerably more than the contents; I did NOT want to lose those cans. I got a combination bike chain looped through the carrying handles and affixed to one of the vertical supports for the tire bracket to secure against theft of the cans. If someone really wanted to go through the trouble of siphoning off my gas, they can have at it. I had thought about making some sort of bracket that could span across the lids and be locked with a padlock. I had seen a few design concepts which looked promising. I then realized that my main fuel tank is not locked. So why bother with the extra machining to secure 5 gallons, when 20 gallons is just as vulnerable in the main tank?!
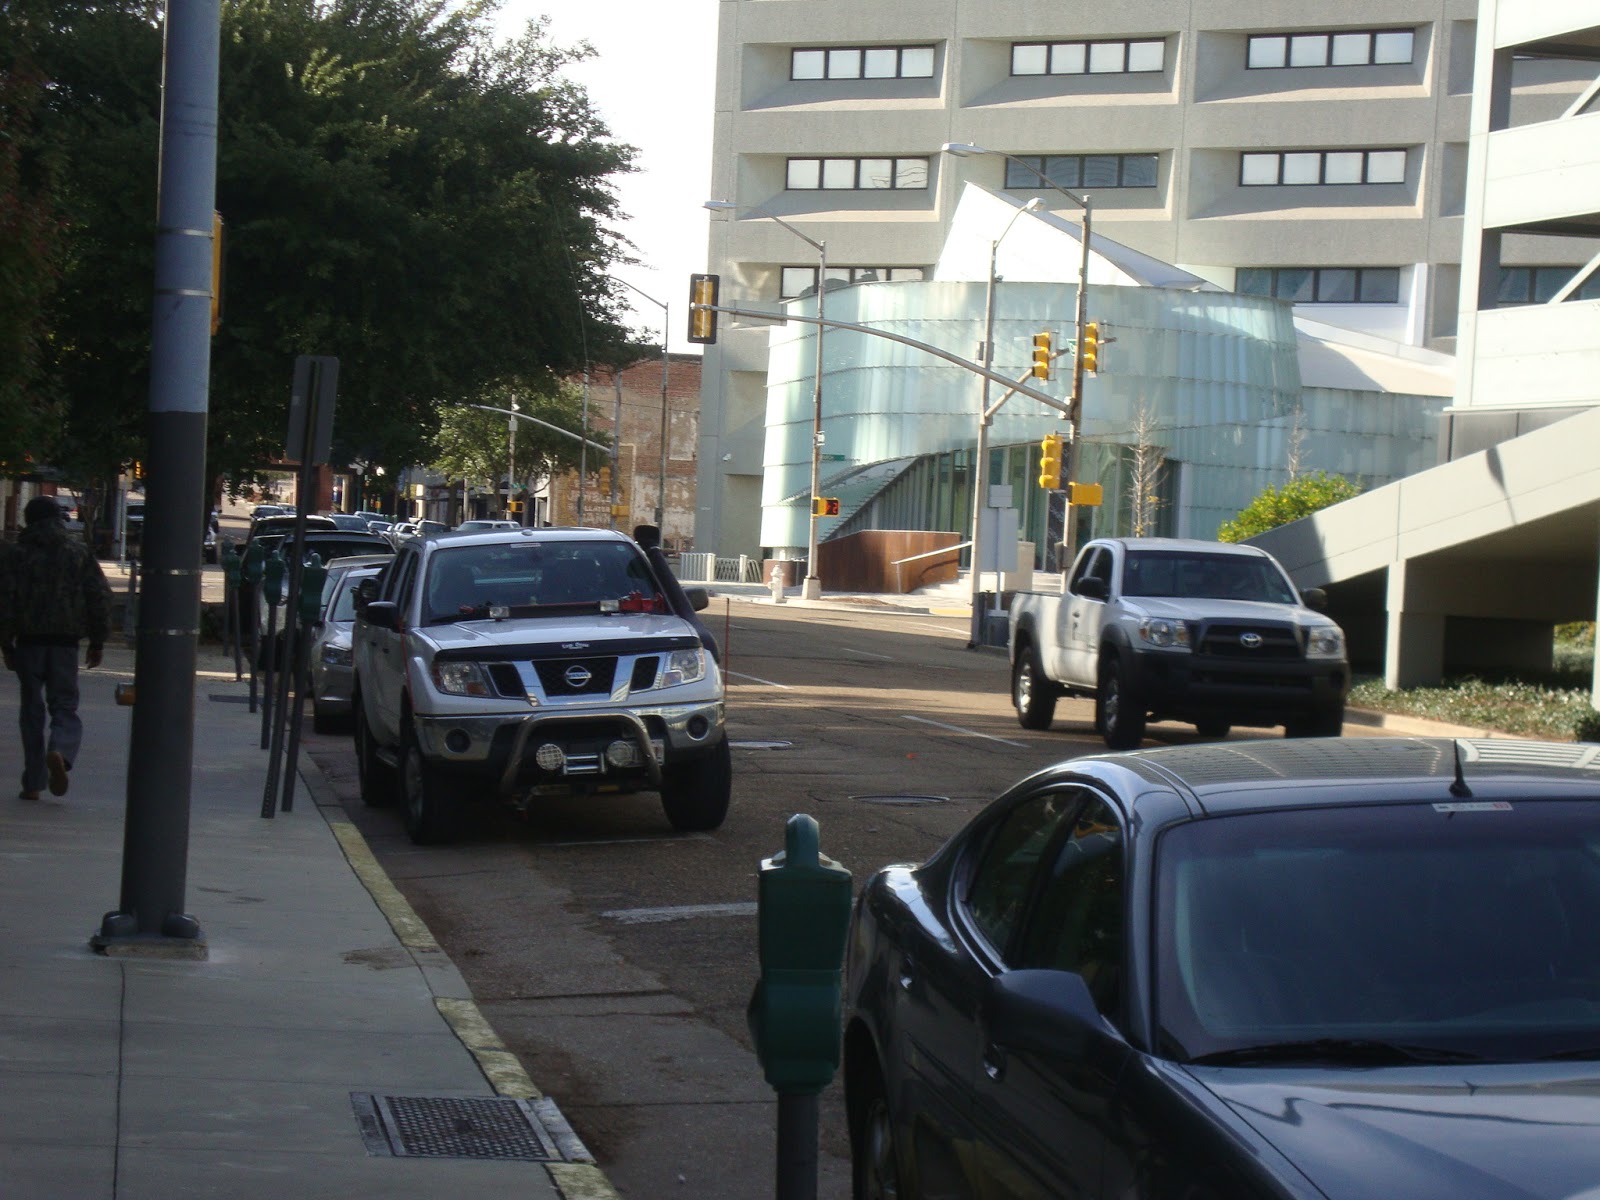
 We stopped in Jackson, Mississippi. Wikipedia (I think) said that this was the tallest building in Jackson. So I took a picture of it when I saw it.
 I asked Jenn to play Peek-a-Boo for the camera. She was feeling a bit playful I suppose and obliged.
 The man who took this photo for us initially asked me for a can of Fix-a-Flat. Well, he first asked me about the Zombie Response Team. After I explained, he then asked about the Fix-a-Flat. I guess if one appears to be as prepared as I appear to be, you think them a likely candidate for random supplies a la Pep Boys or something. So we got into a conversation about how the modern vehicles increasingly come with TPMS sensors which are damaged by spray-patching products as an explanation of why I didn't have any. He then bummed like 5 dollars off of me while explaining that he was not a bum but needed to secure a repair to his vehicle after having driven his mother-in-law into town. At the very top of this sign, there is like a top hat emblem and the words "Elite". I had hoped to have them captured in this photo, but he failed to get it. I don't mind random conversations with strangers, but I get leery of unsolicited attention while on travel and with my wife; I decided to leave well enough alone, get my camera, and go into the restaurant.
 This artifact was mounted on the interior of the restaurant describing the 50 year plus history of the restaurant. It is located on the same block as the city government building.

 I wanted my truck to pose for a picture. That is all.
 We made it to Louisiana not long after our brief lunch time stop in Jackson. This sign was off to the side of the road just beyond an overpass that spanned across some rather marshy looking terrain. The Wetlands caption thus seemed appropriate. I was glad to be able to again get a good shot of the Welcome sign. On the Utah trip, it seemed many of the signs were in the mid-span of a bridge or in an area with no shoulder. We were very fortunate to have pretty good access to almost all of the signs. There was maybe one where the combination of it being dark and the road being under construction that we opted to forego for safety considerations.
 Jenn hiking back to the truck.
 What follows is a series of photos intended to make Sean Mignano jealous. Sean actually introduced me to the series Duck Dynasty. I do not have cable and do not regularly watch any sort of reality programming even when it is available. Anyway, I was over his house for some reason, and he and his wife put the program on. And I'll admit, it is pretty entertaining. I asked him where in Louisiana these guys were based, as I knew by this time that I'd be travelling through the state on the way to the Grand Canyon. As it turned out, Monroe, Louisiana was right along the route (20 if I recall), that we were taking westbound. It took a little convincing of Jenn to merit the slight diversion into a town she's never heard of regarding a show she's never seen on the off chance that the stars might be present. But once she had looked into it a bit on the iPad, she acquiesced and away we went.
 Trying to get Jenn to get me, my truck, and their tractor trailer all in the same frame.
 I took over the camera duties here.
 Jenn didn't understand why I insisted on wearing the Tech shirt in Mississippi.
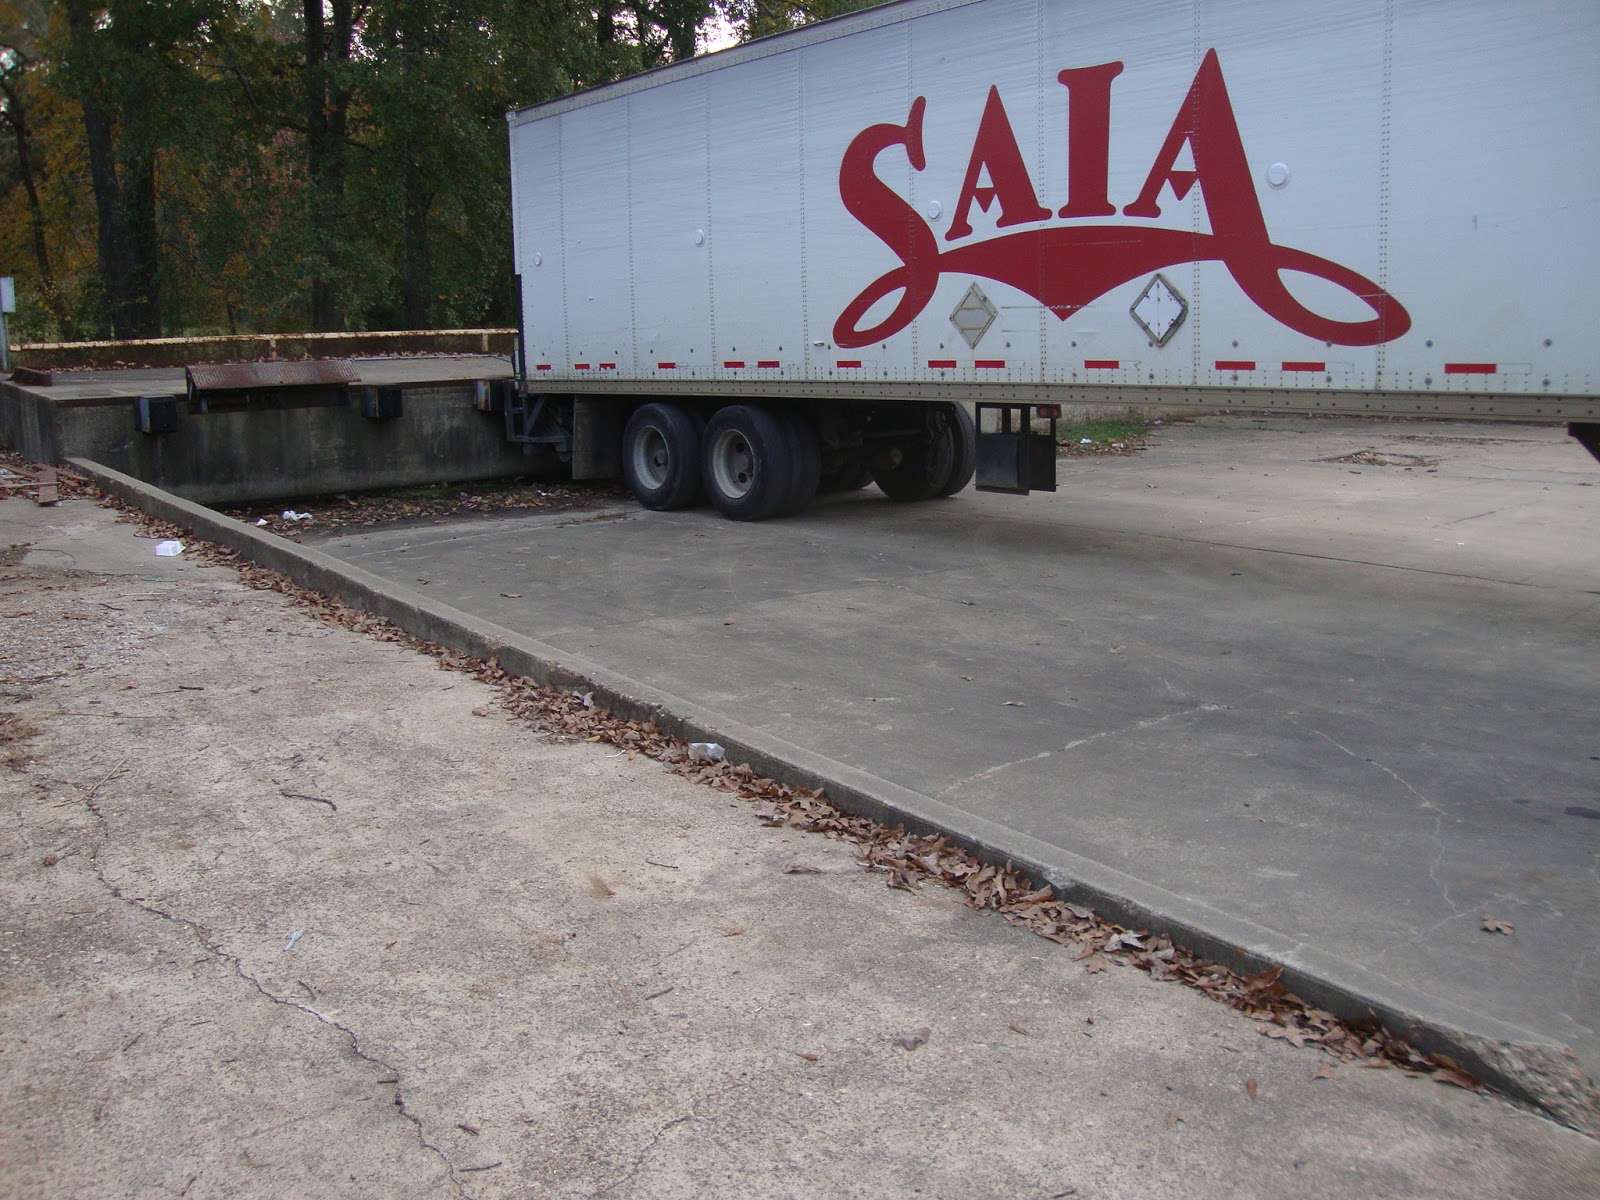
 One of the episodes that I watched features the guys trying to flood the loading dock to make a pond. This random truck showed up to actually like conduct business or something as I was framing up the shot. Well, I guess in later episodes they realize it was a dumb idea as there was no sign of the ducks or the pooled water. I had really hoped that they kept the pond and I could maybe feed some ducks.
 Another camper. It must be Willy's.
 Then there were random built-up trucks out there. There was also a Jeep that was lifted. While we were in the store, people were taking pictures of my truck as they thought it might have also been Willy's. They were disappointed to see me get into it. Jenn said they should have known based on the Maryland tags.
 The inside portion is just a gift shop. There's a warehouse area but it was very dark and no one appeared to be in there making any duck calls. There were no tours. There were plenty of people inside though clamoring over merchandise and making phone calls like, "Dude, we are actually HERE. No...no, I don't see them, but what do you think _____would want us to get?"
 Shreveport, LA was our next stop. They have a really nice casino and outlet shopping district that seems to be one of those best-kept secrets. Maybe it was low key due to it being a week night. I had originally wanted to go to New Orleans; Jenn had previously been and wasn't interested in the additional driving. Turns out it was a good call on her part. We would not have arrived to the Grand Canyon until much later. This was a nice, pleasant surprise.
 I was glad to have taken down the rack and cargo basket. One of the first areas to park was a garage across from the El Dorado casino. It turns out it had great clearance (maybe 7-foot), but garages nonetheless give me a little anxiety due to the suspension and body lifts on the truck. The outlet area was all surface parking and was accessible via a bridge. If you are super-lifted, you'll have no problem visiting that area.
 We didn't do any gambling. My limited funds were going to gas, and Jenn's was covering lodging for nights where she didn't much want to sleep in the truck. I had brought gear for camping, but the weather had been a bit unseasonal. Rainy first day, unseasonably cold days in places where we were expecting mild temperatures...etc.
 When they finish the construction in this area, it will be really nice.
 In the parking garage. Random, I know.
 I now want to visit every Bass Pro Shops location. A lot of the time, they seem to pop up at points where I'm trying to maintain the itinerary which doesn't afford the opportunity to stop. Jenn has admitted that she'll either sit quietly or try to avert my attention to something else until after we've safely passed the exit to go to them. I'm not mad at her for that; I do the same thing when we pass an outlet mall and I notice they have a Coach store. "Hey babe, can you look ahead to see what we can do in El Paso?" The sneakiness works both ways.
 I noticed this place just prior to the bridge that crosses over to the Outlet area. The Blind Tiger. Seemed interesting. We went in and I learned the history of the term which dates back to the days of Prohibition. Look it up and see what explanation you come up with.

 Pretty cool artwork on the menu. I ordered my first ever platter of Etouffe. I got the crawdaddy etouffe which was delicious as a side to accompany my Blind Tiger burger which is a traditional hamburger but then it had a slice of Canadian bacon and some other ingredients that temporarily caused my heart to fibrillate...in a good way.
 From there we made it into Texas. Again, I had lofty goals of trying to make it to Midland by nightfall. Well, it was well past nightfall before we even hit the border, let alone 3/4 of the way across the great state of Texas.
Further complicating things, I think this was the night that my stomach was not cooperating...at all. That's probably why the camera work stopped at this point too. We made slow progress through Texas through the night. We crashed somewhere roadside and then Jenn took over some driving in the morning, which you'll see in Day 3. But at least we got to Texas.

On the road again!


 From the leaves in the background, you can tell this is going to be one of those "Fall Foliage trips". We're headed out to Arizona to see the Grand Canyon via a southerly route that will take us through Tennessee, Alabama, Mississippi, Louisiana, Texas, and Arizona. On the return leg, we'll pass through New Mexico, Oklahoma, Arkansas and I might need a map to report on the balance of states. The itinerary is less well formed as there isn't a specific event at the midway point as there was with GONE Moab that I was trying to make. So we'll just play it by ear.
 Jenn with the Hokie bird in the Virginia Tech bookstore. We made a brief stop in Blacksburg.
 Introduced Jenn to the new tradition of jumping out of the truck and getting ourselves in the frame of the shot of the Welcome signs. Unfortunately, when we crossed into Alabama it was about 10pm and pitch black. The photo opp was further complicated by some construction efforts that had partially occupied the shoulder and we had a big rig barreling down on us from about a half mile back. It wasn't worth the potential calamity.


 Although it looks to be late in this photo, it was only about 6pm. We'll have to rethink another fall trip as this was usually prime visiting time during the summer road trip. Just missed making it in to the bookstore. No tchochkies for us.
 The cool thing about the University of Tennessee campus is that, if you've made anything of yourself, they name a street or a building after you. We passed Chamique Holdsclaw lane near one of the stadiums. Then noticed this gem on the way to get a shot of Jenn in front of the stadium gates.
 While we were parking a guy asked Jenn about the Zombie Response Team. She doesn't ride with me often enough to have one of the 'responses' lined up and ready to deliver; so, she just deferred to me.
 This is the restaurant that Jenn found online during the drive. At first it seemed sketchy because it was a bit off of the beaten path and on a road without any other attractions or amenities. Turned out to be a diamond in the rough with a live band and very hospitable hosts and wait staff. Meo Mio's. It was Nawlins themed (New Orleans).
 The truck wanted to pose as well.
I probably should have posted this up where Jenn and I posed. This is the back of the rig. I spent the first 60 miles of the trip nervously checking the rear view mirror every 15 seconds to make sure the damned thing hadn't fallen off. It seems to be holding fine for now. All told, it is VERY heavy. The bumper setup itself has to be about 200 lbs. Then about 80 or so for the two tanks and another 40-50 for the tire. I have one extra set of add-a-leaf springs. If I keep these on, I'm thinking I'd like for Santa to bring me one more set to add.

Monday, October 22, 2012

The Grand Canyon

Look out Grand Canyon; here we come!

The Mrs. and I are looking to head that way very soon. For the past few months, it was probably looking like this blog was more of a glorified build thread than an actual travel blog.

I'm going to try to get the swing out carrier completed in time such that we have spare fuel and a way to carry a second spare tire in the back. I learned from the Moab trip that there are some long stretches of highway in places like Kansas and South Dakota that one can go quite a ways on the main road and not find a service station for miles on end. Now, there's maybe traveling off the beaten path some, but I wasn't feeling quite that adventurous last time.

Hopefully we can get a couple more sponsors on board to help out. I'm thinking about adding a solar panel to the dual battery system as an additional charging source in addition to the alternator. If one were to fall into my lap, certainly. But I won't break the already fragile bank to do it. We'll see.

Getting excited though.

Sunday, October 14, 2012

Housekeeping

Not too much to add visually to the truck. The effort was actually on cleaning up the look of the truck. Although it was a long weekend, a portion of it was spent traveling up to Philly to visit the wife and attend a wedding. Prior to leaving, I did start mocking up the 2nd attempt at a swing out tire carrier. I cut off the stock bumper from the frame and re-installed the shroud to the frame rails. Now I just have four bolts to remove to get back to the frame and continue mocking up the new bumper.

When I got back home from Philly, I took the time to clean up the running of wiring for the camp lights. I relocated the rear set of camp lights down to a lower point on the headache rack. All of the wiring for the lights now runs down below the chassis and is run along the frame rails. This greatly cleaned up the roof line of the truck as I was able to get rid of all the unistrut I was using to create channels to protect the wiring from getting crimped/pinched against the roof rack while transporting ladders.

Speaking of the rack, I'm now moving away from it being full-time installed. I'll look to deploy it on an as-needed basis. My next little mini-project will be to create a small little storage compartment beneath one of the tool boxes for me to store the rails and brackets there until I need to re-install the rack. If memory serves, it doesn't take an inordinate amount of time to install. The trickiest part initially was figuring out the spacing. Now that I've installed it and it has proven reliable (**recall that I fabbed up a rooftop cargo basket weighing about 70 lbs and used it to carry my spare when wheeling in Utah**) the biggest obstacle of figuring out the positioning has already been overcome. I marked the positions on the inner part of the door jambs. I have a ladder that I need to transport back home from the jobsite. Once that's done, I'll take down the rack and hopefully have my little storage pocket created at that point.

On a final note; is anyone that reads this a participant in rally car racing?

I might start taking road trips to take part in this in 2013.

Thursday, October 11, 2012

BMG metals after work...

I don't have any photos associated with this post. I drove down to BMG metals in Manassas after work today to pick up the carrier arm for the rear tire carrier that I plan on building. This was my second time going there. The first occasion was to pick up the two bent plates that I used to affix the bandlands winch mount C-channel to the stock bumper location. My first failed swing out carrier was owing to my effort to use some free scrap steel in lieu of buying what I thought to be expensive rectangular steel tubing based on an online quote I saw from a metal distributor. Not willing to have another hackneyed project under my belt, I decided I would just bite the bullet and get the right parts for the job. I was pleasantly surprised to find that my 6-foot length of 2"x4" tube steel ran me less than 25 bucks.

The other part I wanted to remark on is the ease of use and service at BMG metals. You would think that an outfit that services machine shops, general contractors, and other professional sorts would have no time or interest in satisfying the one-off purchases of hobbyist and other low volume consumers. However, in my two instances there, I've been treated cordially and been given prompt, same day fulfillment of my one phone order and was invited today to just come see what they had in stock as the size I was looking for is a stock item, but the typical unit length is 24 feet.

This is not a paid advertisement. I just think sometimes when you have a positive experience you ought to share it. Might just help counteract some of the negativity in the world. So thanks again BMG.

I guess I ought to get to the actual fabrication part now that I've got some food in my belly and the day off tomorrow.

If I have something to show, I'll post up some pics.

-will

Sunday, October 7, 2012

Bad Case of Jeep Envy


So I'm back in school these days working on a master's certificate. One of the areas that I park on campus, I've noticed this really tricked out black jeep. It's pretty well built up, but at the same time, looks as though it has never seen an unpaved road. I'm not knocking it, because save for three days out in Utah, my truck is overwhelmingly a street queen as well just with some offroad potential. Anyway, of the things I noted about this Jeep was that he had the hood-mounted high lift jack. And it looks bad @ss.

Now, I already had a high lift jack. The only time I used it was while performing the body lift for my truck. Specifically, I used it to lift the bed off of the frame (one side at a time), by placing a piece of plywood to bridge across the arch of the rear wheel well with the jack centered along the midspan. Other than that, I don't really have any suitable jacking points on the truck as it lacks sliders or a heavy duty bumper. I could probably jack from either of the receiver hitches if the need really arose.

Well, I decided to take on the mod this past weekend. The primary motivation was really to find a place to relocate my 'camp lights' down from the roof rack to a lower point to aid me in parking in commercial garages. The idea of the jack mount was just an added bonus.

I had read that the hood is structurally a poor place to mount a jack. The metal is just not very stout in this area. I thought I had a design approach which overcame this. The first night it performed well on a test run to Home Depot to pick up a little more split loom to conceal the balance of the wiring running from the hood back up to a junction point at the roof. Today, however, on the drive back from the stadium (a loss for my beloved 'Skins) there was a lot more flexing of the hood metal. I'm thinking of filling the hood with the expanding foam stuff that I filled the nerf bars and bull bar with. It is a bit of a messy operation; so, I'll probably wait to tackle it during daylight hours when I've got a bit more energy.

I'll do a build page for it. It'll start with a word of caution to NOT try this unless you've got a better plan of attack then I did.

If form sometimes can win over function, then I'm happy with it as it looks pretty bad @ss on my truck now too. And given that I'll probably only ever take this truck on Green Level trails or accessing up to camp sites, the work should hold up pretty well.

There's also a bit of a segue/segway here:

A couple of weeks back I made the drive down to Iron Pig Offroad and picked up a rear carrier pivot assembly. I'm going to build a swing-out tire carrier to carry a spare and two jerry cans (one fuel, one water). Most folks will also include a mount for the high lift jack. I thought I was clever and was finding a way to minimize the load on the hinge already imparted by the wheel and two, 5-gallon cans. It wasn't a bad idea, just not the best idea either. Check out the page for the Hood-mounted Jack for the Frontier for a few more pics and synopsis.

Saturday, September 8, 2012

Hidden Winch Project Finally Finished!!


This is it, finally buttoned up!!


I'm going to finalize the Hidden Winch page, but this was the type of news that makes front page headlines...(in the little world I escape to in my head anyway). 

I still have some work under the hood to devise a way to fully duct the snorkel so that it is water tight. I'd like to have a mechanic peek at my steering linkage, and I'll probably need to have the power steering flushed (primarily because I want to extend the stock hose to allow the reservoir to once again mount in the bracket instead of being strapped to it. 

Minor details.

This, however, was a major milestone in the build of this truck.

Wednesday, September 5, 2012

Google ME!

Ok, don't actually google "me" as I don't even start to make a blip on the radar until maybe the fourth page. BUT...someone did stumble upon my humble little blog and posted some questions about the Hidden Winch project.

Felt pretty good to be relevant. So I rushed home and made some posts, including this one. Really looking forward to mounting the Shroud this weekend. Fingers crossed that I finish with a stout system.

I also feel that every post should have a picture.

My girl did some work today. We're installing curb and gutter. The electrician's mobile job trailer was in danger (not actual hazard-type 'danger') of being fully bounded by the ensuing concrete pours on an island scheduled to receive landscaping where they had staged it. Unfortunately, the foreman had left with the only truck equipped with a receiver hitch that could move it. The earthwork foreman was leaving but loaned me his 3-ball mount hitch (as my 1-1/4 ball wasn't going to cut it). I literally had to say, "Hey man, my ball isn't big enough. That's emasculating. 

Anyway, here's my girl pulling a full size trailer loaded with electrical gear. Not bad for a mid-size truck. Put her in 4-Lo and away we go. I still suck at backing up a trailer. I should have turned her around once we got to pavement and tried using the front receiver to push it into place with her snout.

-will

Monday, September 3, 2012

I've been busy...


Usually when a guy 'has been busy' it means that things have kept them largely away from whatever their particular past time is. I've been doing my best to tackle a bit of both: those things which keeps one busy and then those pleasant diversions that offer an escape from the hustle and bustle.

The difficulty with working on my various build pursuits is that this truck also is my daily driver which means I can ill afford a mishap or incomplete installation which would prevent usage of the vehicle for mundane activities such as grocery shopping or, you know, going to work.

Well, in the photo above, I've got the winch installed (although still not 'hidden' as I need to devise a custom means of mounting the bumper shroud), the 2" body lift (above and beyond the 2" suspension lift), and the snorkel.

I'll set up build pages for the two new items to cover them in greater depth. I had hoped to take the long holiday weekend to finalize my various build threads, but my wife also eyed this weekend as a good opportunity to visit her folks who recently relocated back to North Carolina. That isn't a bad thing. The whole spirit of this blog is about getting out on the road. The problem that I encountered was that I didn't have enough time to finish the work begun on Friday in time to iron out a few of the kinks encountered before our departure time on Saturday. It was very nerve-wracking not having my truck with us on the trip. Sure, people road trip with lesser-equipped vehicles all the time. Unfortunately, my mind has been fixated on a series of contingency-planning exercises; so, just getting into another vehicle with only modest capability takes a bit of woo-sahing to get back to my prior nonchalant way of life.

We had a good time. It rained, but there were no floods. X on the need for a snorkel. The house wasn't as remote as we had assumed. X on the need for a solid rear axle and 4WD; my wife's selectable AWD and all around independent suspension was sufficient for the highway driving. Our initial route was available and not snarled by traffic. X on the need for the CB radio to communicate with truckers to find alternate routes. It was fine. I enjoyed my wife's company and it was no big deal. But if we travel anywhere further than 4 hours away from home, the truck IS coming :)

Sunday, August 26, 2012

Body Lift and Snorkel...coming

On the Hidden Winch page of this blog, I provided an update that the new winch had arrived and was operational. I'll await the install of the body lift to then devise the new means of attachment for the factory bumper shroud. Very excited to finalize these latest components.

Sunday, July 8, 2012

GONE Moab came and went. Now what?!

So this is over and done with. The question is, now what?

I learned some very important lessons which are driving some of my build decisions going forward. A few off the top of my head are as follows:

1. Reserve Fuel
2. Winch Accessibility
3. Equipment Choices & Access

1. Reserve Fuel
I wish I had thought to take a photo for item #1: Reserve Fuel. When I bought my generator, I thought to also pick up two (2), 5-gallon gas containers for it. The local hardware store only carried plastic fuel cans and I thought nothing of the choice at the time. The trip to Moab was very much spur of the moment. And with a dwindling time line and limited funds, I tried in earnest to make due with what I already had where I could. Well, putting the plastic fuel cans into service in the hot desert heat was a poor decision. Those things were swollen up like hot air balloons after the first day. They held up well on the drive out to Utah. I guess the moving airflow at highway speeds exceeding 70mph kept them from heating up too much. Well out on the trail, where we're climbing and crawling at much less speeds, the heat accumulation became too much. I swapped them out for one metal, NATO style can. And I really wish I had heeded the advice of two of the guys there from California that were perhaps the most excited I've seen anyone get about a fuel can. The relatively recent CARB legislation changed what is to be a fuel can in America. And in Utah, there was a cache of the now unavailable nozzle and cap kind. I tried to find a second metal can here locally and was disappointed with the inferior, "compliant" designs now available.

So I'll have to decide if I want just one really good can, or will also add an inferior can to the mix as well. Once I've made that decision, I'll move forward with designing my own Jerry Can mounts for the truck. My dilemma at present is that I don't want to take up any more bed space than what is already given up for the toolboxes (side mount on either rail and one in-bed mount). I like the idea of the swinging rear gate carrier, but I don't want to replace the rear bumper needlessly. (Similar constraint with item #2). So once I get my winch configuration done, this will probably be the next build that I tackle.

2. Winch Accessibility
I thought that the idea of having a winch that could be installed in front or rear of the vehicle would be the ultimate in versatility. In theory, yes. In practice, it would be a pain in the @ss. On the White Wash Sand Dunes high centering catastrophe of 2012, I had my own winch and front receiver and front receiver mount. So why didn't I pull myself out? If given the option of having another driver with their winch already mounted, and wired, and ready to be put into service, would you really go through all of the fuss that my setup entailed to pull off the extrication? Not at all. "Why not just ride around with it out front all the time?" Well that would be fine as long as I stayed on pavement. The moment I attempt anything higher than curb height, that winch was going to be smashing into the obstacle headlong due to the relatively low ground clearance and virtually non-existent approach angle. The cliche is often stated as "that's where the rubber meets the road", but in actuality, my deficiency crops up 'where the rubber leaves the road' and things get real.

Now, if money were no object, I do have interest in maybe carrying a second smaller winch which could be wired up and installed in the rear. Again, it wouldn't work to have it installed and left back there full time. For one, it would preclude me from being able to ever tow anything without relocating it. Further, and perhaps I did not illustrate this sufficiently in the prior posts, the Frontier has a pretty tough time with departure angles when descending stair step formations due to the long wheel base. On some particularly challenging runs, I pretty much was leaving a cursive signature on the rock faces where my trailer hitch was digging into the rock faces. Absolutely nothing can be mounted back there when on the rocks. This also cancelled my notion of using the rear cargo carrier that mounts into the rear receiver hitch. I had toyed with the idea of having it in the 'flipped-up' position while trail riding, and then if, while riding around town, I needed the extra cargo capacity of the bed, I could move the in-bed tool box to the rear cargo carrier. That won't work offroad. I did recently employ that Transformer-esque maneuver while assisting my wife from moving to one temporary apartment to another while she completes her residency out of state. It worked reasonably well on the tamer side of things driving around in suburbia. I even made good use of the off-road cargo basket (subject of another build thread that I've yet to publish)  to carry her mattresses. So offroad things do have their suburban contributions, but I am finding that suburban ideas don't translate so well in the converse direction.


Getting back to my point, I need a way to have the winch accessible to me and ready to go. And the more than likely need will be at the nose of the rig. In the rare instance I need to be dragged out kicking and screaming from the rear, either someone else will need to have a winch or I can try to rig up the high lift jack as a come-along and work it that way.

The pictures above are from my exploration into learning how the stock bumper is attached, and more importantly, how to go about removing it. I am interested in keeping the chrome shroud. The bumper itself, the steel underframing is exactly at the ideal mounting height of my winch. If you've seen my ride in real life, you probably witnessed the epic fail that occurred where I thought I could weld a receiver bracket to the bumper itself, while still installed on the truck. That was stupid. If nothing else, I should have at least removed the bumper to do the welding. Then, in the process, I would have seen that the metal that makes up the bumper is not of sufficient thickness to withstand the manner and magnitude of the loads that would have been imposed upon it. What I was trying to avoid is the process that is entailed with removing the bumper. Every narrative I've ever read indicates that the grill must also be removed. I was apprehensive of doing this for fear that I'd force one of the tabs too hard and fracture it, forever after having a flimsy, floppy grill unless I wanted to fork over big bucks to replace the whole thing. Fortunately, once you get into it, it is a very easy process not only to remove but also to replace it. I put my bull bar back on to serve as a temporary 'bumper'.


I'm working on a build thread for the completed hidden winch. I ran into an issue. The construction, although protracted, had been going pretty well. I spooled out some of the cabling by hand to access a bolt in a tricky location. Had everything bolted in and was ready to re-fit the chrome shroud onto the new mounts I made. I just needed to respool the winch cable. Went ahead and connected the winch to the battery for the first time and PRESTO. That being if 'presto' is Italian for "nothing happened but some clicking". So I'm working on getting a replacement winch. The mount itself feels super stout and I'm anxious to actually test it out. Once I get the new winch in, I'll finish the build thread and create the link at the top of the blog page. I'll probably post to ClubFrontier and try to earn some virtual fame around the forum.

3. Equipment Choices & Access

How about some good news? I was very impressed with how the cargo basket held up. It was my first full-on welding project and it was subjected to some pretty significant forces due to the abrupt shifting of the truck while on the trail where it was pressed into service to transport my full-size truck spare tire. The two sets of maritime deck lights were a great touch as well. Sometimes I want to have a switch at the control console to throw them on, but since they are not DOT highway lights, it is probably for the better that I don't have that switch. Their intended function is to be utilized when at a camp site to illuminate the surroundings. They do a good job of lighting the area immediately near the truck without being a nuisance to others nearby. The switches to the front and rear are in the toolbox and are connected to the dual battery system's auxilliary battery. That setup works great because I found I was generally going into the toolbox anyway to access the inverter to power some other accessories and needed some light for activity around the truck. The only noted deficiency was in my paint job. Two coats weren't sufficient at the edges. Many edges are showing signs of rusting. Other than that, it was a good build.

Things that weren't so great. I tried to improve upon our practice from the first road trip of just throwing all of the luggage and souvenir bags haphazardly into the back row of seats. It was very disorganized and difficult to retrieve anything in a timely manner. Not only was there a risk to something being damaged, it also created a conspicuous enticement to any-would be thieves. The tinted rear windows do help to some extent, but a determined thief could still spy the contents if they were so inclined. I'd rather they make off with the goods and deal with that loss then also have a smashed window to boot. For this most recent trip, I put a Stanley rolling tool chest in the back of the bed. I kept all of my luggage and souvenirs in this box, which came equipped with it's own lock. Further, I used a bike chain lock to secure the rolling tool chest and the gas cans to the bed of the truck so that no one could just easily walk off.

The pros: Very easy to organize. Easy to transport on wheels. Freed up space in the vehicle for additional passengers and also my cooler.

The cons: Not water proof (only moderately water resistant. Infiltration at lid seams when subjected to water hose test). Took up the remaining cargo space in the truck bed and made it difficult to retrieve recovery gear stashed in the in-bed toolbox. When my buddy joined me on the return leg of the trip, we quickly outpaced it's capacity and still ended up with a few miscellaneous items in the rear seat. Not nearly the rats' nest that my wife and I had on the first trip, but still not my desired outcome.

I'm still noodling a solution to this issue. I've never been a fan of the truck cap. That would solve the storage problem, but I've always felt that if i was going to go the way of a cap, I might as well just get a Ford Explorer or some other boxy alternative. In reality, having an Xterra would not be a bad way to go. I have a lot of respect for those vehicles after seeing them in action on the trail. I may have stated here elsewhere, but there is a certain appeal to the pick up truck's open bed format that I feel is lost once you throw a cap or a tonneau cover on it. I can't very well overload the roof. For one, it is not rated for much over 150 lbs. And even if it were, I wouldn't want to sacrifice handling by raising the center of gravity or further compromise fuel economy by introducing more drag. We've also covered that extending anything behind in a rear carrier is not an option due to departure angle. And finally, a trailer is not desirable as it limits one's ability to make evasive maneuvers if you've got to quickly reverse direction and high-tail it out of a hostile area. Think about anytime that you've ever had to back up a trailer. Now imagine doing that under duress. Not an easy constraint to overcome with this platform. Still working on it.

WHAT NEXT?

I'll be looking into planning another road trip. Maybe something in the December/January time frame. I need some time to save up some money and/or engage more sponsorships. I've also only got a few vacation days left for this calendar year. It was so worth spending the ones used so far. No regrets there. Finally, as new ideas or solutions come into play, I'll be in the garage working up some modification to derive more utility and (more importantly) fun out of owning this truck.

Stay tuned.