I'm so behind on updating. There are maybe 3 people who will notice when this is updated.
There will be three posts in...hopefully...quick succession.
I first picked up the metal for these bad boys in mid-April. I think the date on this was 4/18/13.
I picked up the pipe bender previously, but th is was the first day that I actually opened it up. I think I had already started a DIY build page but just hadn't built anything.
When I came across some spare time, I would do small mini-fabrication efforts. Cut the rails down to size. Another day, I cut and bent what were originally going to be outrigger hoops to extend up at an angle off from the rails. As I started to feel how heavy these things were getting (and realizing my still novice abilities might result in some gnarly looking sliders...in a bad way), I decided to keep with the more simple concept of rock rails sans outrigger hoops.
I fabbed up my own brackets to be through-bolted via existing holes in the frame. Here they are free supported prior to painting.
The driver side was tough because there is minimal clearance between the frame and the gas tank. I know some guys, for various mods, will drop their gas tanks for better access. I just spent a LOT of time noodling a concept instead and it appears to hold. Need to put it on some rocks and see how well.
Painting them up.
"Final" product.
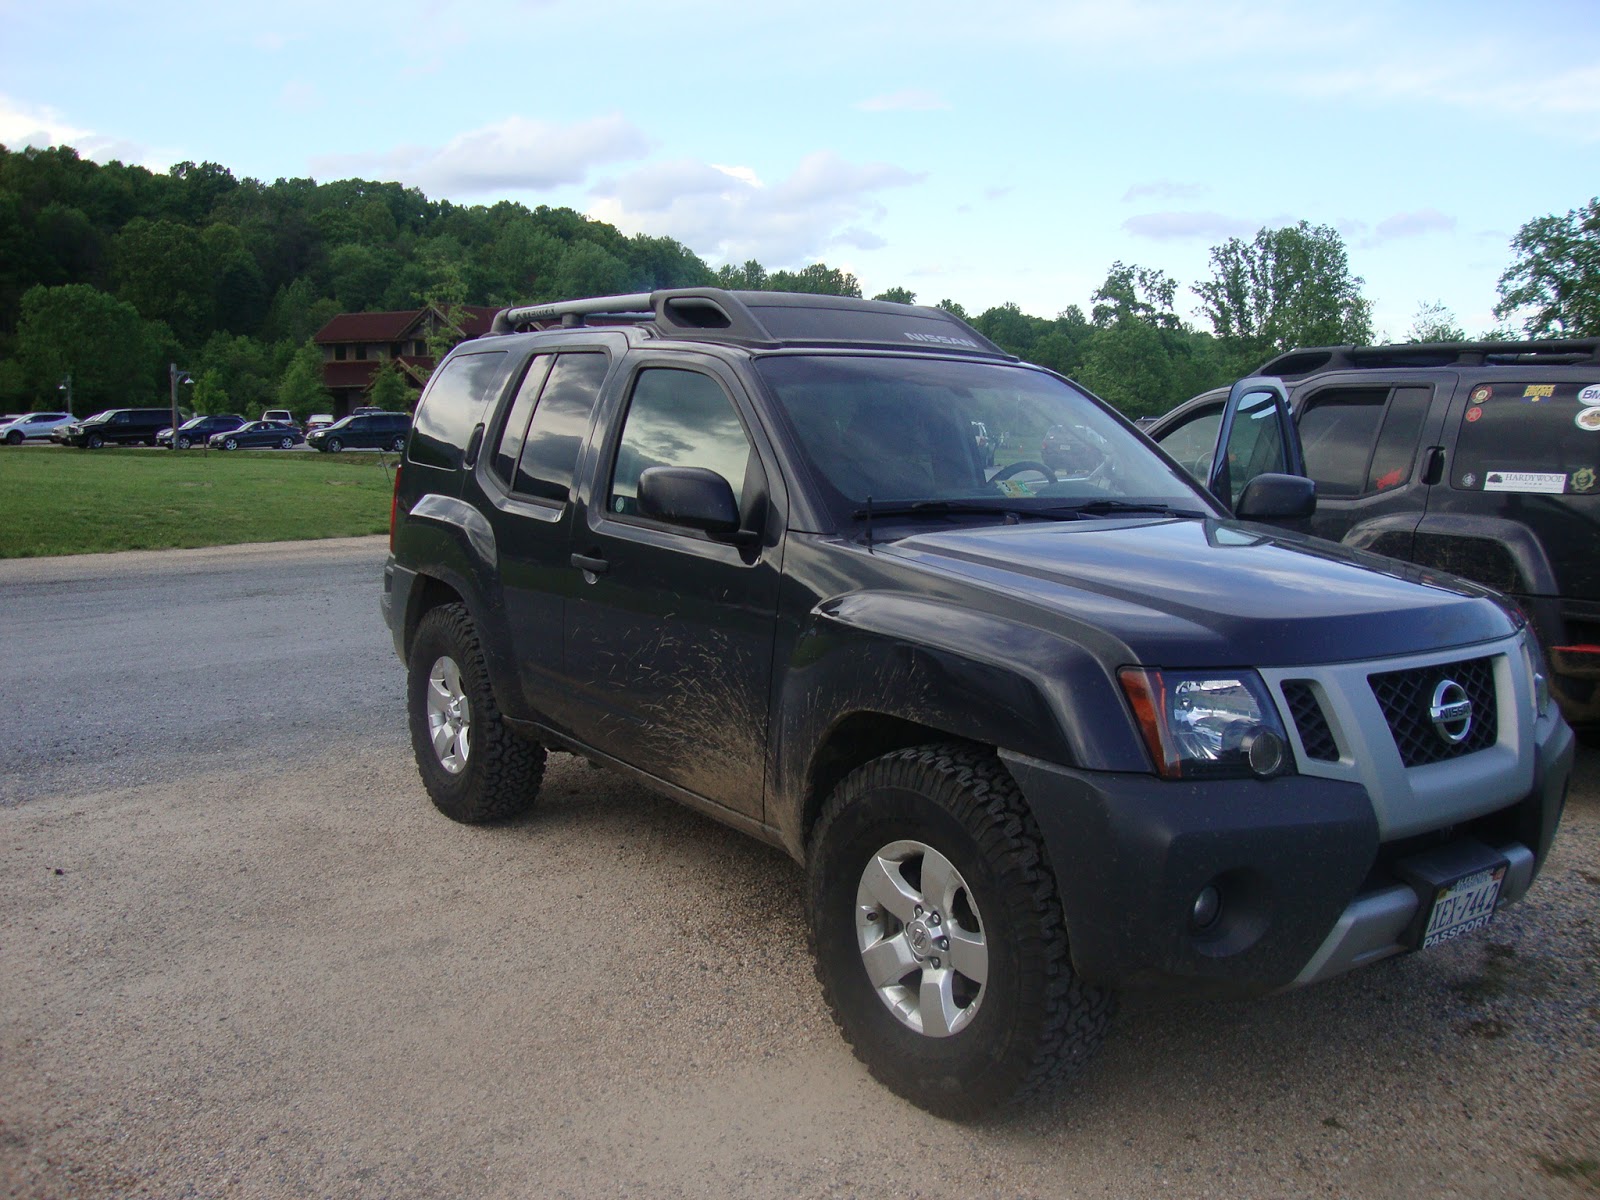
Yeah, I took off the Zombie decals. The truck had gotten to be pretty conspicuous. My wife reminds me that the snorkel and antenna are not exactly subtle either.
My Girl: Gettin' After It!!
My truck on her maiden voyage in Moab 2012
Monday, August 12, 2013
Wednesday, June 5, 2013
Some Irons in the Fire
Well, I've been trying since before Shoe Creek to get my act together and fab up some rock sliders. I did succeed in getting the metal. In this post, you'll see that I've managed to bend some metal. I started to type "succeeded in bending some metal", but that would indicate success as if I had achieved a flawless outcome. "Flawless" they are not, but functional is my intent. I also picked up another spare set of steel wheels which took me out to the Eastern Shore of MD which I was able to schedule to coincide with a trip up to Philly to visit the Mrs. I need a solid few weekends where I can machine some stuff, but that would also cause me to potentially miss some viable chances to wheel. So given that my production capacity is limited due to my wheeling opportunities increasing, this update also covers me biting the bullet and ordering a rear diff skid plate since my differential housing has been nicked a bit here and there. But what's a good post without photos?!
First thing I started with was cutting down the actual rails to the approximate size desired. I recall cutting them down to 7 foot even. I'll double check
I then decided I wanted 7" long sections to serve as the outriggers to offset the rails from the frames so that they would end roughly centered along the rocker panels. Normally, I would measure and cut each item. I decided that I wanted to experiment with pulling the same consistent measurement from the factory-cut end and make the same cut along each face of the square tube so that I was only handling the tube a total of four times to cut all 6 pieces out. This required using clamps to secure the workpiece to another section of tubing.
Came out pretty consistent excepting for one outlier that was maybe 1/8"-3/16" taller.
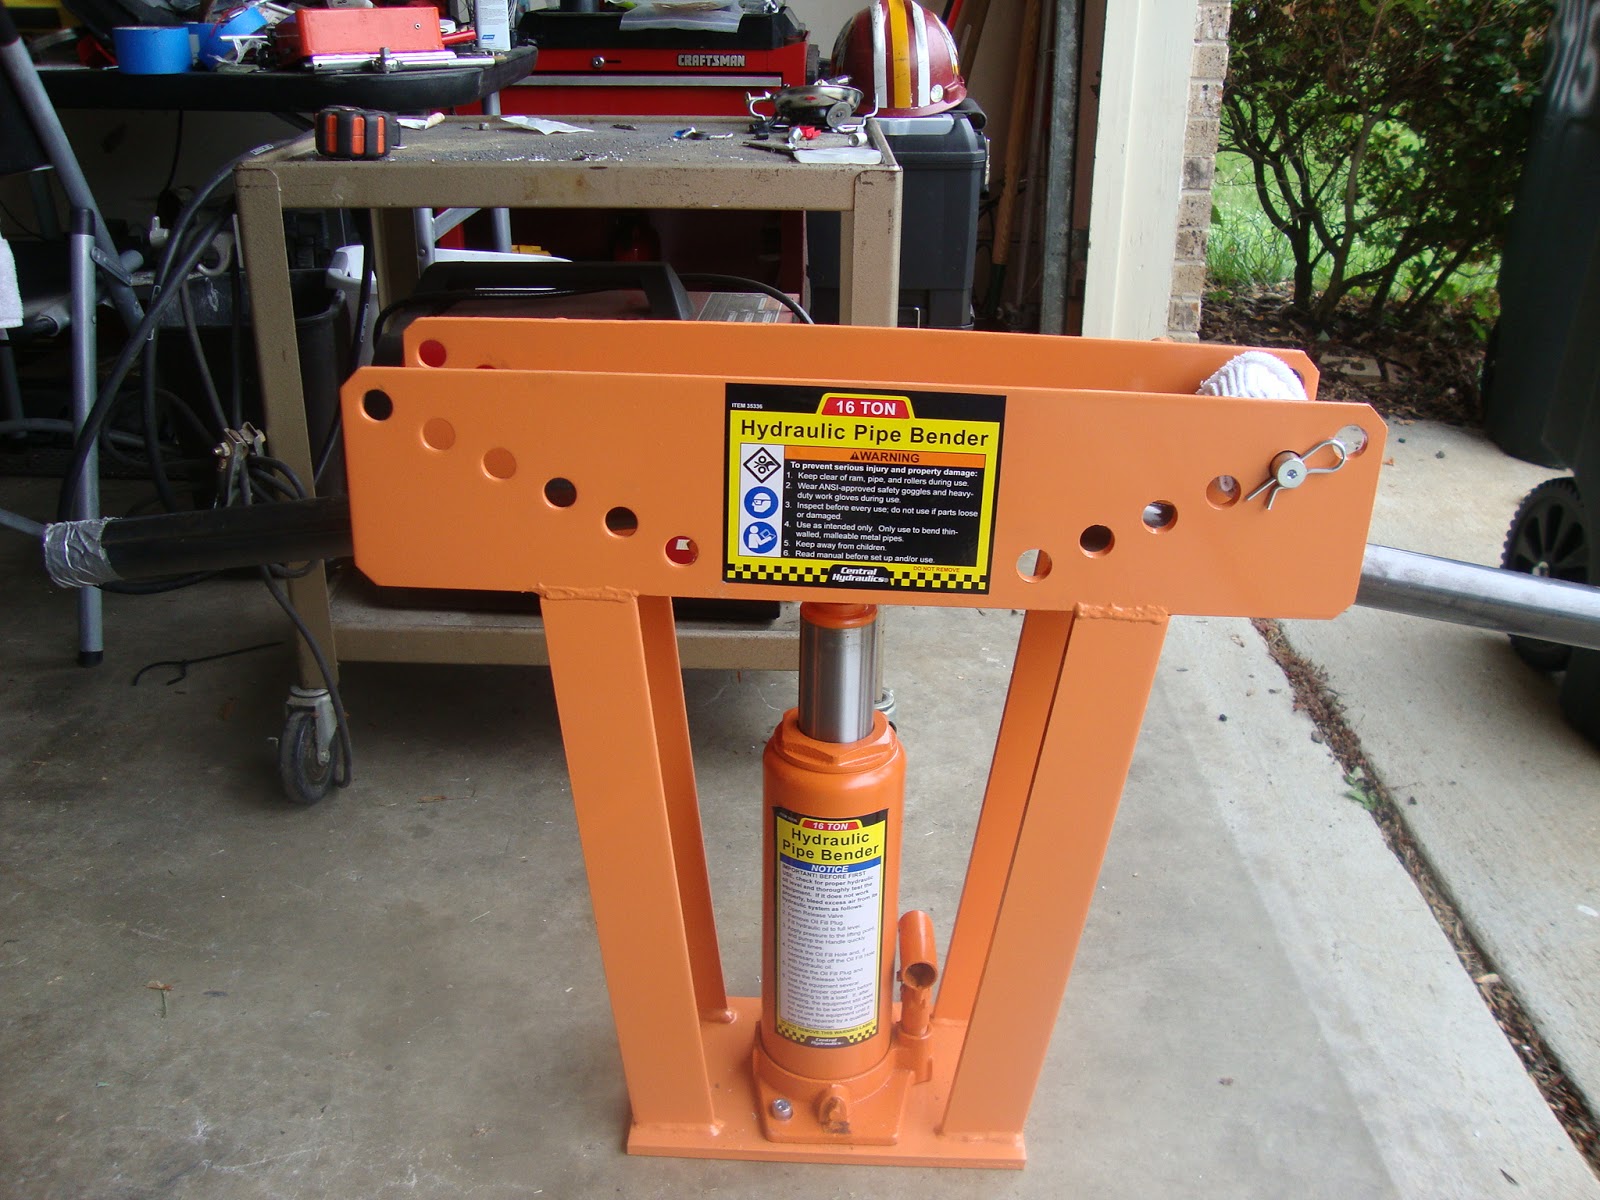
Now a pipe bender is not the tool of choice for what I was attempting. However, this pipe bender cost about $200 bucks whereas a professional grade tubing bender starts at about $2,000 or so. Before even taking on this project, I read tons of blogs and forums on how a pipe bender might as well be considered a 'tube kinker' when used in these sorts of applications. There were also, however, folks whose dogged determination and incredible skill resulted in some very well executed builds despite the shortcomings. I was not quite as fortunate, but I wanted to try nonetheless. One of the recommendations is to fill the pipe with sand. I was starting with a section 11 feet long. So how does one get sand 11 feet up in the air to pour down into a pipe? You need not go that high. This is my little setup using my front porch.
Well, it is bending...
This was about as close to 90 deg as I could get this diameter of pipe to bend
The two pics above show where I kinked the pipe. Fortunately, the more severe of the two indentations made by the rollers is beyond where I plan on making my angled cut to weld the step portion to the square rail. I tried cutting sections of a sock and placing them over the rollers to lessen the effect of metal-on-metal contact to lead to kinks, but that may have had opposite of the intended effect. The added friction may have actually kept the rollers from rolling enough to distribute the force effectively. Once again, trying to do too much and probably made matters worse. Typical.
The next two pics above show that I was successful at least in getting consistency in where the contours occur and replicating the same angle of bend. On the second one, I rushed the process a bit. It was a combination perhaps of extra confidence once my Dad arrived and then also rushing a bit as it was starting to get late and it was a work night. I didn't want to keep my Dad out unnecessarily late for something he had not planned on witnessing. I generally call him when there is a potential for me to be a danger to myself. He encourages the practice. Not the practice of me endangering myself...although I'm sure he has resigned himself to the fact that this is a given. I am thus encouraged to at least call.
Segue a few days later and I was headed out to Kent Island to meet a fellow enthusiast hailing from Chestertown, MD. I was prepared to make the full trip out that way. I dated a girl that went to school there many many moons ago. Probably not a good story to get into given the Mrs. and all. Anyway, S-Bug (forum name) actually suggested a half-way point which was really cool of him. I had mentioned I was familiar with the drive at the time of my responding to the CL post. Anyway, his latest Frontier is a '12 model; so, newer than mine. And purty. I think he said he's got a spacer up front and either shackles or blocks in the rear. He's also got some good tires, although this pic doesn't' quite do it justice. We talked about mods and the need to get more Frontier guys organized for wheeling. He previously had an '08 which is how he had the extra wheels/rims available.
I got the first set really only intending to track down a single rim to mount a second spare onto. I ended up getting a set of four for what I was looking to pay for a single. S-Bug offered essentially the same deal, which I again could not pass up. Please monitor me to ensure I do not become a hoarder.
Well, what I was left with after the first transaction was two spares, and then three random rims. It was not enough rims to mount my stock tires on. So then I wanted to find one more rim to swap my second spare onto so that I could make the second set of rims whole and mount the tires.
Now what I think I'll do is get a set of M/Ts in 285/75/16 in a few months and then have the Nittos and the BFGs to alternate between periodically.
I tried to get some pictures of the Bay Bridge. It is pretty impressive. As a kid I used to be a bit afraid of it.
I took 301 North up to Delaware and then connected onto 95 about 8 miles south of the 495 interchange I normally take on the way into PA. I didn't think had previously gotten a Delaware sign; so, I got one with Veronica. She has her own album in the works.
The last time I was on a long drive, I really wanted some Dairy Queen. And soon as I had that thought, I passed what turned out to be the last one as I got closer in to home. I was sure I would run into another but it never came to be. So this time as I was headed out, I looked for a good spot to stop.
Fast forward a couple more days to today when my box arrived with the rear diff skid.
It looks kind of like a Klingon Warbird. My inner "Trekie" is a bit malnourished. Maybe it is Bird of Prey. I can't remember what the Klingon warships were called and it would be cheating to look it up and then editorialize. I challenge you, if you know the correct nomenclature, to actually post a comment in the Comment Section providing the correction.
So, although I'm not necessarily that guy that will "write a letter", I did observe when I put it down on the ground for a photo that it appeared to be quite asymmetrical.
And the outrigger/stirrups didn't seem to be in quite the same plane either. Before I started to assail someone else's craftsmanship, I thought back immediately to my struggles with bending the pipe. I also had to acknowledge that I had no other viable means of accomplishing the bends myself short of welding together angled sections of plate...and we all know my welds can be hit or miss. So I decided to relax, considering this is a feature that isn't generally visible and is intended to take unexpected bumps and beatings along the trail anyway.
Well, if I had any words of dissent, I would have surely needed to eat them once I went to test fit this thing. It fit pretty much like a glove. My only criticisms/recommendations would have been 1) to furnish four additional lock washers for the lower axle mounts. The forward two bolt locations were furnished with lock washers whereas the aft/lower U-bolt mounts weren't. I happened to have 4 on hand, and then I realized most anyone doing this sort of thing with their truck is likely to have lock-washers or perhaps lock nuts on hand and would just make due; and, finally, 2) I may have considered furnishing an additional contoured U brace so that the U bolt could be inverted. My rationale for this would be so that the nuts and extra threads are up above the axle. As I learned with my DIY skid, anytime you have a bolt and extra threads hanging down, you can be well assured that at least one of them will meet a rock...violently. If I had another one of those contoured U pieces, I'd have accomplished the flip flop now, but lacking such, the flat portion of the outrigger/wing portion would not have mated appropriately with the curve of the axle.
I enclosed a few more pictures so that folks can see some of the detail of how it fits into place.
Having this in place does not alleviate one from applying the principle of attempting to place a wheel on any high spots on the trail instead of trying to straddle. The difficulty I encountered down at Shoe Creek was that the trail was, in many places, only as wide as my rig and there were pronounced rocks, boulders and the like nearly dead center of the trail. It was either take the brunt of it or go toppling over the side of a precipitous drop-off into said creek. Fortunately, my diff only had minor abrasions from my prior forays wheeling. However, with as many outings as I've been sizing up over the next few months, it seemed like a worthwhile investment to spend about $135 to offer a bit more protection to the drivetrain.
That's about all I've got for this update. I've got a few irons in the fire to tend to.
-MANIMAL
First thing I started with was cutting down the actual rails to the approximate size desired. I recall cutting them down to 7 foot even. I'll double check
I then decided I wanted 7" long sections to serve as the outriggers to offset the rails from the frames so that they would end roughly centered along the rocker panels. Normally, I would measure and cut each item. I decided that I wanted to experiment with pulling the same consistent measurement from the factory-cut end and make the same cut along each face of the square tube so that I was only handling the tube a total of four times to cut all 6 pieces out. This required using clamps to secure the workpiece to another section of tubing.
Came out pretty consistent excepting for one outlier that was maybe 1/8"-3/16" taller.
Now a pipe bender is not the tool of choice for what I was attempting. However, this pipe bender cost about $200 bucks whereas a professional grade tubing bender starts at about $2,000 or so. Before even taking on this project, I read tons of blogs and forums on how a pipe bender might as well be considered a 'tube kinker' when used in these sorts of applications. There were also, however, folks whose dogged determination and incredible skill resulted in some very well executed builds despite the shortcomings. I was not quite as fortunate, but I wanted to try nonetheless. One of the recommendations is to fill the pipe with sand. I was starting with a section 11 feet long. So how does one get sand 11 feet up in the air to pour down into a pipe? You need not go that high. This is my little setup using my front porch.
Well, it is bending...
This was about as close to 90 deg as I could get this diameter of pipe to bend
The two pics above show where I kinked the pipe. Fortunately, the more severe of the two indentations made by the rollers is beyond where I plan on making my angled cut to weld the step portion to the square rail. I tried cutting sections of a sock and placing them over the rollers to lessen the effect of metal-on-metal contact to lead to kinks, but that may have had opposite of the intended effect. The added friction may have actually kept the rollers from rolling enough to distribute the force effectively. Once again, trying to do too much and probably made matters worse. Typical.
The next two pics above show that I was successful at least in getting consistency in where the contours occur and replicating the same angle of bend. On the second one, I rushed the process a bit. It was a combination perhaps of extra confidence once my Dad arrived and then also rushing a bit as it was starting to get late and it was a work night. I didn't want to keep my Dad out unnecessarily late for something he had not planned on witnessing. I generally call him when there is a potential for me to be a danger to myself. He encourages the practice. Not the practice of me endangering myself...although I'm sure he has resigned himself to the fact that this is a given. I am thus encouraged to at least call.
Segue a few days later and I was headed out to Kent Island to meet a fellow enthusiast hailing from Chestertown, MD. I was prepared to make the full trip out that way. I dated a girl that went to school there many many moons ago. Probably not a good story to get into given the Mrs. and all. Anyway, S-Bug (forum name) actually suggested a half-way point which was really cool of him. I had mentioned I was familiar with the drive at the time of my responding to the CL post. Anyway, his latest Frontier is a '12 model; so, newer than mine. And purty. I think he said he's got a spacer up front and either shackles or blocks in the rear. He's also got some good tires, although this pic doesn't' quite do it justice. We talked about mods and the need to get more Frontier guys organized for wheeling. He previously had an '08 which is how he had the extra wheels/rims available.
I got the first set really only intending to track down a single rim to mount a second spare onto. I ended up getting a set of four for what I was looking to pay for a single. S-Bug offered essentially the same deal, which I again could not pass up. Please monitor me to ensure I do not become a hoarder.
Well, what I was left with after the first transaction was two spares, and then three random rims. It was not enough rims to mount my stock tires on. So then I wanted to find one more rim to swap my second spare onto so that I could make the second set of rims whole and mount the tires.
Now what I think I'll do is get a set of M/Ts in 285/75/16 in a few months and then have the Nittos and the BFGs to alternate between periodically.
I tried to get some pictures of the Bay Bridge. It is pretty impressive. As a kid I used to be a bit afraid of it.
I took 301 North up to Delaware and then connected onto 95 about 8 miles south of the 495 interchange I normally take on the way into PA. I didn't think had previously gotten a Delaware sign; so, I got one with Veronica. She has her own album in the works.
The last time I was on a long drive, I really wanted some Dairy Queen. And soon as I had that thought, I passed what turned out to be the last one as I got closer in to home. I was sure I would run into another but it never came to be. So this time as I was headed out, I looked for a good spot to stop.
Fast forward a couple more days to today when my box arrived with the rear diff skid.
It looks kind of like a Klingon Warbird. My inner "Trekie" is a bit malnourished. Maybe it is Bird of Prey. I can't remember what the Klingon warships were called and it would be cheating to look it up and then editorialize. I challenge you, if you know the correct nomenclature, to actually post a comment in the Comment Section providing the correction.
So, although I'm not necessarily that guy that will "write a letter", I did observe when I put it down on the ground for a photo that it appeared to be quite asymmetrical.
And the outrigger/stirrups didn't seem to be in quite the same plane either. Before I started to assail someone else's craftsmanship, I thought back immediately to my struggles with bending the pipe. I also had to acknowledge that I had no other viable means of accomplishing the bends myself short of welding together angled sections of plate...and we all know my welds can be hit or miss. So I decided to relax, considering this is a feature that isn't generally visible and is intended to take unexpected bumps and beatings along the trail anyway.
Well, if I had any words of dissent, I would have surely needed to eat them once I went to test fit this thing. It fit pretty much like a glove. My only criticisms/recommendations would have been 1) to furnish four additional lock washers for the lower axle mounts. The forward two bolt locations were furnished with lock washers whereas the aft/lower U-bolt mounts weren't. I happened to have 4 on hand, and then I realized most anyone doing this sort of thing with their truck is likely to have lock-washers or perhaps lock nuts on hand and would just make due; and, finally, 2) I may have considered furnishing an additional contoured U brace so that the U bolt could be inverted. My rationale for this would be so that the nuts and extra threads are up above the axle. As I learned with my DIY skid, anytime you have a bolt and extra threads hanging down, you can be well assured that at least one of them will meet a rock...violently. If I had another one of those contoured U pieces, I'd have accomplished the flip flop now, but lacking such, the flat portion of the outrigger/wing portion would not have mated appropriately with the curve of the axle.
I enclosed a few more pictures so that folks can see some of the detail of how it fits into place.
Having this in place does not alleviate one from applying the principle of attempting to place a wheel on any high spots on the trail instead of trying to straddle. The difficulty I encountered down at Shoe Creek was that the trail was, in many places, only as wide as my rig and there were pronounced rocks, boulders and the like nearly dead center of the trail. It was either take the brunt of it or go toppling over the side of a precipitous drop-off into said creek. Fortunately, my diff only had minor abrasions from my prior forays wheeling. However, with as many outings as I've been sizing up over the next few months, it seemed like a worthwhile investment to spend about $135 to offer a bit more protection to the drivetrain.
That's about all I've got for this update. I've got a few irons in the fire to tend to.
-MANIMAL
Sunday, May 12, 2013
Shoe Creek Trail Riding: VAXC Inaugural Meet-up
This past Saturday was the inaugural run of the rejuvenated VAXC- Virginia Xterra Club. As we all know, I roll with Xterras because it seems that my fellow Frontier owners can't get it together enough to have any regional clubs. We'll coast along on someone else's coat tails, I guess.
This first picture is from the meetup for the Richmond crew. Although the organizer provided coordinates for the trail head and there was another meetup close to the trail head, I decided to meet the first rendezvous point at the Wawa in Richmond.
So there was, of course, an accident on 95 South which threatened to make me late. I left the house at 615 for an 845 meetup and fortunately made it with about 10 minutes to spare. It was a single car crash where some chick hit the guard rail. All the truckers were talking about it because 1) it was annoying to be held up first thing in the morning; and 2) because apparently she had a smoking hot body. It was just my luck though, that by the time I passed the mile marker (152 I believe), the authorities had removed her and what was left of her vehicle. So the rest of the 6 prior miles were really backed up for no reason as there was only a state trooper cruiser that remained and he was parked on the median.
I thought it was funny that sometimes my GPS didn't know what road was ahead. "Umm...Road Ahead". Thanks, Liza. (I think the voice is named Liza).
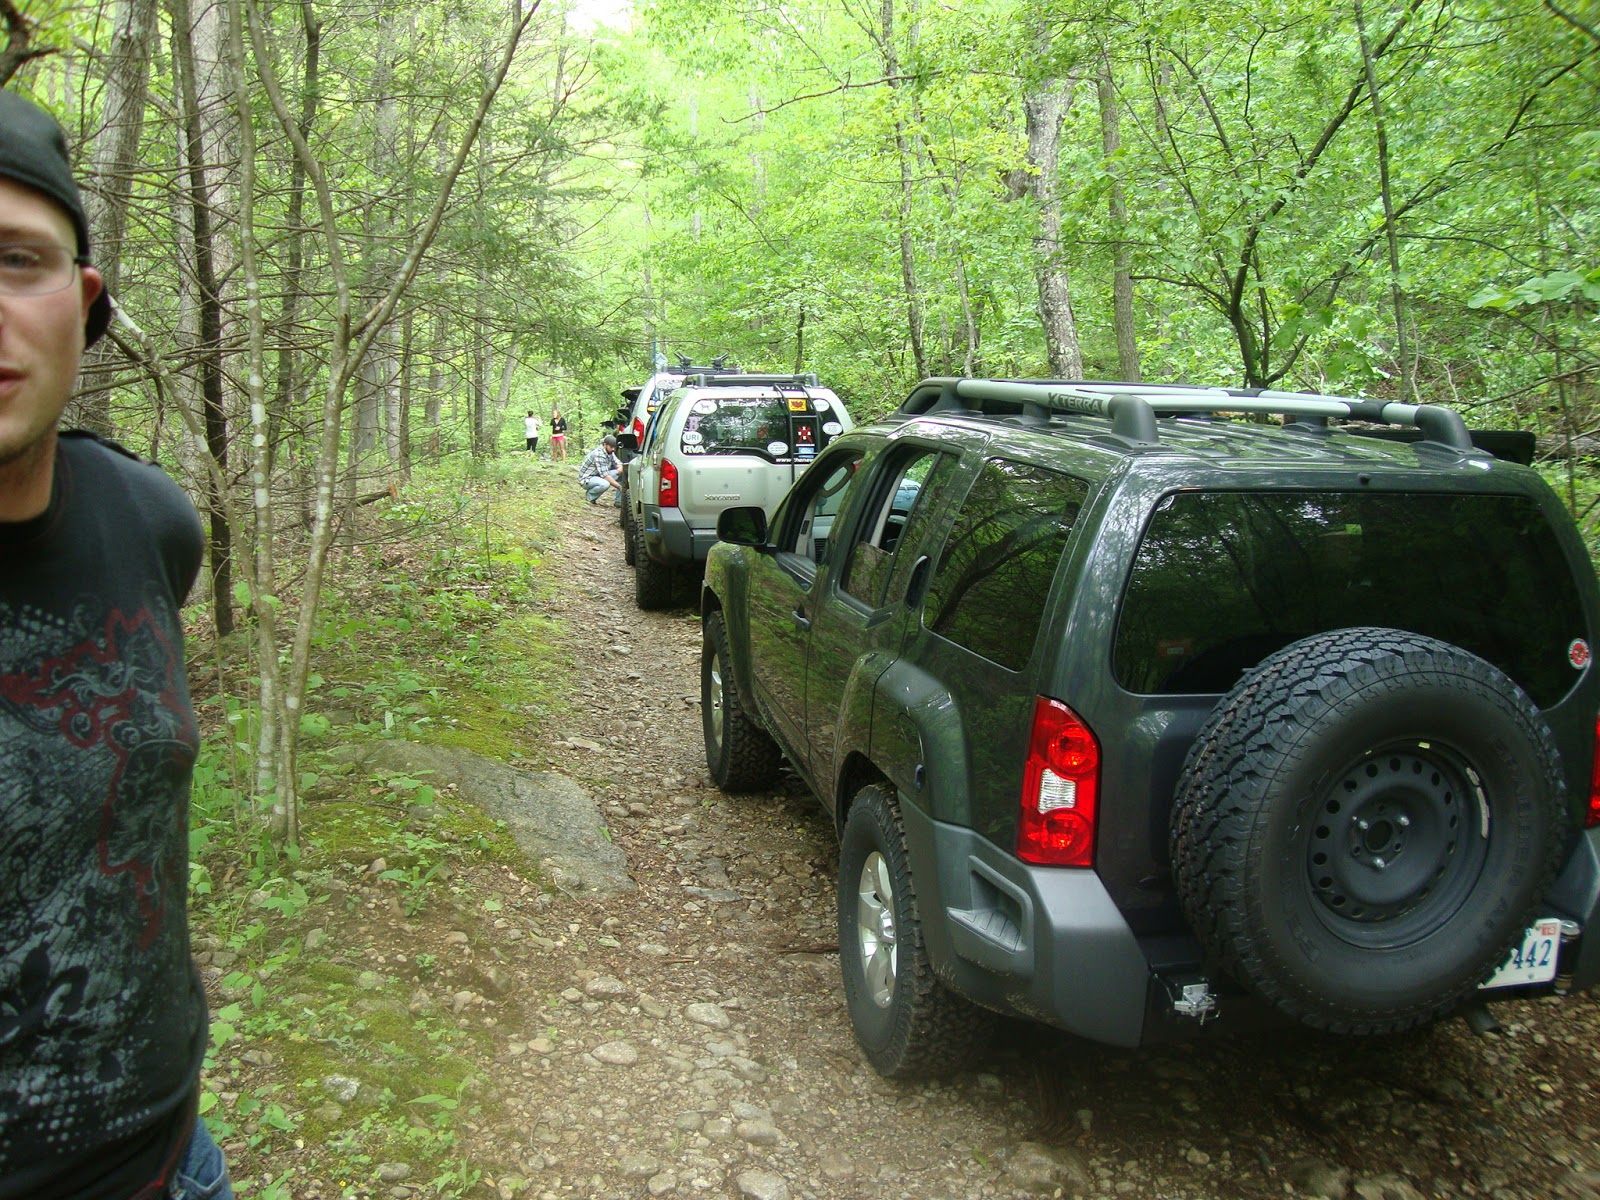
We were passing through to an area just south of Charlottesville. Below are some miscellaneous shots of the convoy.
Alright, so Dave and his girlfriend met us at the meetup spot that was about 20 miles out from the trail head. And then I got trumped by Mike's even more extensively built up Frontier. Not that I ever feel self-conscious about being the only one to tag along, but it generally is good to have another vehicle of comparable wheelbase and platform against which to gauge various lines that can be taken to navigate through, around. over obstacles.
Mike's Frontier. I was tail-gunner for most of the trip. A lot of the guys didn't have radios. When I went to Moab and it was a requirement, I thought it was maybe a bit over-the-top the emphatic insistence that either a radio was in each truck or you weren't eligible to ride. I already had one based on my own intrigue/paranoia regarding available modes of communication. So I wasn't really put off by that request. After having done this trail ride with many drivers who did not have a radio, I now am in agreement that they are absolutely essential. Even for mundane things like signaling to another driver that you intend to back up, or pause for some reason. There's not a lot of room for guesswork on the trails. This one in particular was challenging not so much due to the obstacles but due to the fact that there were very few bypasses and the dense vegetation limited line of sight.
Lining up to air down. We thought there would be an open clearing to allow for this, but the road pretty much passes a guy's backyard, runs maybe 100 yards into the woods and then there's the first crossing of the creek and the sign below.
This photo doesn't quite do it justice, but at it's deepest point, water was probably pushing about midway up my passenger side door. I tried getting video of my own crossing, but the deceptive depth level caused me to need to shift my focus to maneuvering through the crossing.
There's definitely some engineering that goes into a Calmini lift kit. I've seen lots of photos of them over the years, but this was probably the first time I've seen it up close and personal on a Frontier (I've seen a few on Xterras). Just the geometry of how everything fits together is impressive enough. Then to see the 35's he has mounted on here just casually bouncing over rocks was pretty cool. Meanwhile, I was trying to keep my brains from being rattled out of my head, as my 'bumping' is not nearly as casual with only 30" or so diameter tires.
So unfortunately, my tires don't do so well with mud. Here is where they were having a hard time self-cleaning. I was trying to amble up a hill to make way for a Jeep and, believe it or not, a Honda Ridgeline, that were coming down the other way. I was able to get out of the way, but did not fare nearly as well as Mike did with his M/Ts which propelled him another 50 or so feet further up this muddy embankment. I'd like to think maybe...just maybe locking up the front and rear might have helped once one tire got caked and began slipping.
A little bit of "stuff" on that same hill.
A little bit of "droop"/"flex".
My girl, Veronica, likes nature. I figured I'd have her pose in the middle of a small tributary crossing.
Below is where I thought I was taking an easier bypass. It was not. I had amble down a step, stop short of a tree, turn on a dime around a boulder, and then up and over a fallen tree...all within like 20 feet.
Which then lead to a little bit of a 3-wheel lean.
That's all the flex I have.
And you can see that my girl gets pretty well stuffed here.
I'm far from being any sort of 'expert', but the moment the @ss end started to lift up, I knew what was happening and why. I didn't panic, I just let the weight shift and positioned the front wheel in such a way to control the balance. Then I handed Mike the camera out the window as he saw that I inadvertently took the harder of the two and was wondering if I needed a spot. There was a sizeable rock beneath my nerf bar which he was concerned was going to push them up into the rocker. I said to him, "Not worried about the nerfs, just keep me off that boulder that'll dent the door in. Oh, and take a few pics for me, because if this ends badly, I want to remember how she looked for posterity".
Got through that fine and got one more parting shot as we exited the first/last crossing.
I say first/last because somewhere we made a wrong turn which looped us back through and out the bottom of the trail where we entered. We had intended to exit at the top of the trail which would have put us a bit closer to Devils Backbone Brewery.
That little calamity earned Josh the nickname of Magellan as christened by Tom.
Overall everyone made it out unscathed. Mike was having issues with his Frontier overheating and shutting off. So although we were trying to expedite our progression through and off of the trail, on the return leg, that seemed to not deter him from taking two of the more difficult paths into some of the 'play areas'. At that point, I relinquished tailgunner duties stating, "If that guy stalls again, I'm not staying to babysit anymore with these antics!".
Fortunately he made it out ok and everyone had a good time.
This is us lining up at Devils Backbone Brewery. A few of the guys had to cut out and head back early.
In honor of Steve, who is very much alive, I tried to take a page from his book of photographing meal experiences. Dave's girlfriend made some comment about people who photograph their food having a higher incidence of mental disorder. I think with some of my proclivities, she may have a point.
I set the camera up on self-timer and tried to snag a candid. Dave and a few others caught on.
This was the Turkey melt with BBQ Ranch baked beans. But it isn't your grandmother's turkey melt. Gourmet bread and house-made sauce made this a delectable treat.
My compulsory shot of airing up the tires which proves there was some serious wheeling that transpired previously. I took the Nittos down to 25psi this time.
Some closeups of some of the other Xs.
Josh was telling us that this area (along route 151 in Nelson County, VA) is renowned for its many breweries and cider establishments. He had a few of the decals on this window. I would find out upon the occasion of my return leg home that you really can't go more than a mile without happening upon another one.
There was a storm rolling in and I really considered high-tailing it out of there. But something said, "Well, turn around and just make one more quick stop. Just get a decal and a complimentary sample".
When I return, I will buy this shirt. I opted for the namesake 22 oz beer and had the Alpha Ale as my sample. I plan to share the Blond Hunny with Steve if he ever comes out of hiding. And its weird because I owe HIM money. And I feel like he hides from me. Well, I have his address and will mail the check. And then maybe he'll stop avoiding me and come help me drink some of these beers I brought back from Alcohol Alley.
There was another small shop on the premises, Zestivities, that had this decal for free. That's when I knew I was onto something here on Route 151. I do not condone drinking and driving. I had a beer with my meal and committed to partake in no more than a small, sample size tasting of any other place I might happen along on my way home.
Veronica likes to pose in front of landmarks and signs.
This is so blurry I shouldn't even post it.
My GPS was taking me on a pretty roundabout way home. Rockfish Gap Turnpike was one I was slated to take. I took it and it lead me to more great finds off the beaten trail. If you go up and down 95 exclusively, you are missing out on some great treasures.
My next stop was the Blue Toad. Totally unplanned. I drove past. It looked interesting. I pulled a three point turn in a neighboring property (Sorry for trespassing), and doubled back.
No decals this time, but I did buy a shirt to make up for the bartender's trouble of pouring me a free sample when she was busy with other folks. I sampled the Bold Rock Cider which I believe is a microbrew made locally. It was good. It had, kind of a 'wheaty' finish to it, which I felt was a nice twist. I'd have to maybe have a larger sample to say for sure. But I still had a long drive and couldn't fully partake.
Some pictures from out front so you know what it looks like if you are passing by.
The pictures here are a bit reversed. In a few down, you'll see what I observed from the road. Folks were playing corn hole out on the lawn and it really looked like a really big picnic in front of a wealthy socialite's home. It was, in fact, Blue Mountain Brewery which is definitely a destination in this area. All walks of life were here. This place was so bustling, that there were several parking lot attendants to help guide people onto and off of the premises. And everyone was friendly. The waitstaff were all relatively young folks, with bright and energetic faces greeting folks warmly as they all bustled about bedecked in their royal blue t-shirts sporting the company logo. I really wanted to hang out here for a long time.
A kindly older lady (with all of her samples lined up beside me) was willing to snap this photo for me at the bar where I humbly requested my one sample. I tried the Full Nelson at the recommendation of the hostess who sold me my two decals, (and later put me in a full nelson figuratively to encourage me to buy a 6pack of the beer of the same name. I acquiesced.)
Who wouldn't want to hang out in a place like this?! There were families just all enjoying the weather, even with the storm threatening to roll in. The hostess told me it is the most amazing sight to see the clouds roll in and completely enshroud the nearest mountain peak before God's light show begins. I really really wanted to stay to see it.
The Full Nelson 6-er that I imported back home.
I don't think I saw any more breweries that were open after that. There were a TON of wineries though. If my wife were so inclined and would have taken part, I'm sure I would be just getting back today instead of yesterday at this time. We would have HAD to stop and see each one. I'll have to let her know that she ought not to pass up these opportunities to go wheeling with me; there can be wine in it for her. Especially if we find more available trails which permit OHV use in the area.
Well, in keeping with my theme of Never Missing a Genuine Opportunity, I thought, "How often does one happen upon a Professional Bull Riding event?!" I bust another highway U-turn and doubled back to poke my head in here.
Now, I generally am considered to be rather charming, but I surely fell flat trying to convince the young ladies at the parking lot to let me forego the customary entry fee just to take a peek for 15-20 minutes. Our exchange went something like this:
"Hey, I'm just passing through and was wondering if I could poke my head in as I've never in my life been to a real live rodeo"
"Well, you'll have to buy a ticket"
"How much are they?"
"$15"
"Well that's a fair price for an evening full of entertainment. But like I said, I'm just going to be here in town for like 10 minutes. Could I just stop in?"
"Yes...for $15"
She wasn't having any of it :)
She did tell me it was for charity, and while I'll never be able to write it off for tax purposes, I think that there is a sort of karma you collect when you do things for the right reasons. I also bought a raffle ticket knowing I wouldn't be there to collect. The kindly older gentleman who sold it to me nonetheless took the time to engage me in conversation and extended some genuine hospitality. Now you'd think, maybe an old-timer wouldn't warm up to an outsider, especially not one who resembled me, but I find more and more in my travels that this seemingly couldn't be any further from the truth. As I left and offered my departing salutations, he genuinely was trying to encourage me to stay a while. Even offered to talk to my wife to vouch for my whereabouts and that I wasn't up to any shenanigans while there. Very nice fellow indeed.
I scuffed my wheel. No big deal. Last time I took a chunk off of the other wheel on the driver side. Apparently this one was jealous because it lacked character. Now it has some.
There were signs that said "Wilderness 9", Wilderness "4", and I'm thinking "Great, this road is going to dump me in the middle of some desolate wooded area. I just left one wooded area to now run smack into another." But then I found that this sign marks the site of a battle that occurred in this area. And then the town itself I think is called "Wilderness". It is a bit of a misnomer as it is actually pretty well developed. It is right off of Route 3 or there is a junction for Route 3 in this town. And then 3 finally connected me to 95 heading north after about 11 miles or so. The rest was the boring sights I always see once I start to make my way home. I'll spare you guys that.
In a few minutes, I'll post the video. This post is already pretty graphic-heavy. At one point, I was taking more video than photos.. So there's some of that to look forward to.
Subscribe to:
Posts (Atom)