The elusive Hidden Winch.
7/8/12
It's not hard if you drive a Ford or a Chevy. Several companies have models rolling off of assembly lines in various part of the country. Mention a hidden winch in the context of a Frontier and ears perk up, the conversation turns to something somebody did in Sweden, and then maybe you'll get diverted over to what the guys and gals on the Xterra forums have been able to do. But one doesn't encounter hardly any Frontiers that have pulled it off.
The funny thing is, I think I've actually pulled off the challenge of getting something worked up and in there. I'm at a bit of stall point right now because my winch apparently has been defective this entire time. I've had the thing stored in my toolbox since the winter, with a false sense of security in thinking that, if the need arose, I could press it into service. Well, I was hard-pressed to even get the thing to retract its own cabling after free-spooling to access a nut.
Once I get it replaced, I'll populate this page with the details of how I got the mount built and **fingers crossed** hopefully have the chrome shroud back in place.
For now, I kept the mount installed. I boxed up the winch to be returned and remounted what is left of my bull bar and the cheapo lights are mounted where the fairlead rollers mount to the winch channel. The bull bar crossbar had to be sacrificed to the Mod Gods to make way for the winch. There wasn't really a clean way to finish it off. I did my best to cut back the rough spots with the angle grinder, but I didn't want to risk gouging all the way through the walls of the tubing. I may just wrap something around those points. We'll see.
I'll be back to this post soon too hopefully.
7/21/12
The winch got picked up Thursday of this past week. Waiting to hear back on the repair or replacement. In the meantime, I'm also eye-ing up a 2" body lift and snorkel. Looking forward to getting the rig 100% done.
8/22/12
The new winch arrived this week. The mount and everything was already prepped and ready. I got it installed in about an hour or so. Once the power was hooked up, I was able to test out the operation. The cable both powered out and powered back in. Much different response than with the first unit which only intermittently produced clicking noises from the solenoid without any action from the winch drum whatsoever. I have a body lift kit arriving in the next few days. Once the body has been lifted, I'll reinstall the bumper shroud and devise some new attachment points for it. That will complete the hidden winch project.
9/5/12
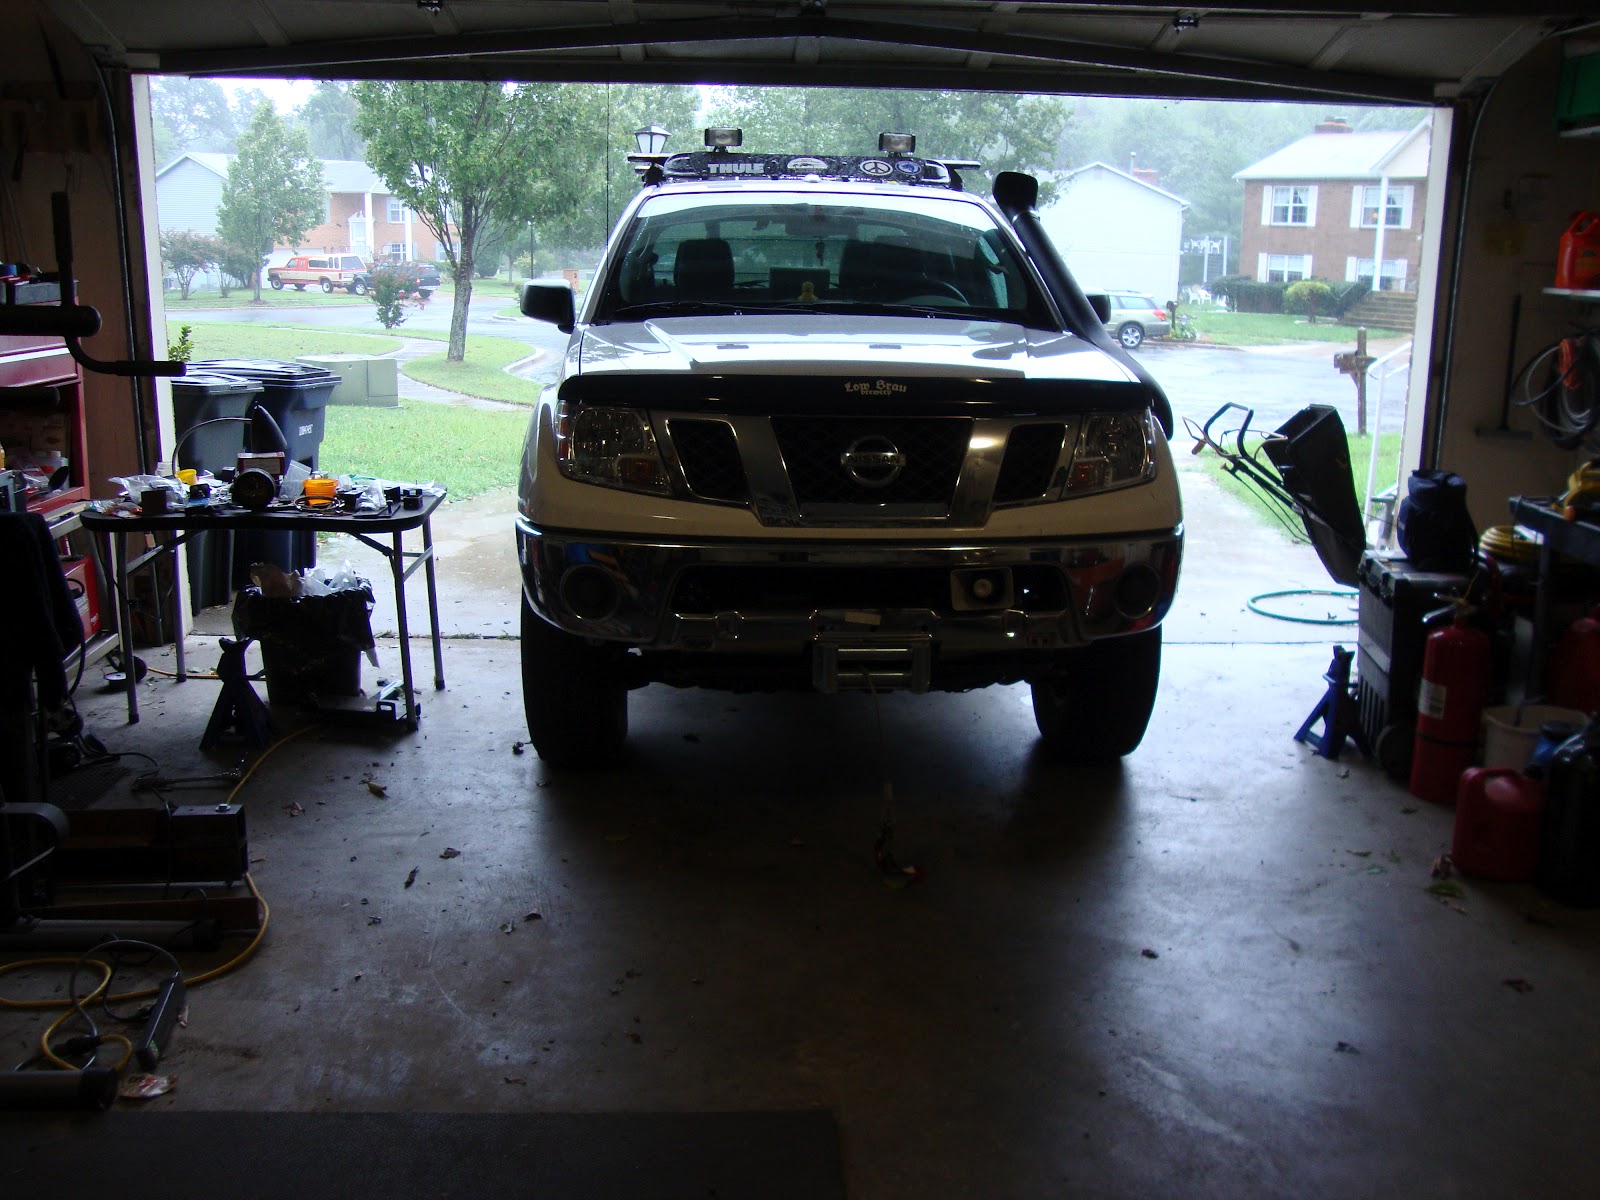
Decided to add a few pics. I plan on completing the narrative once I actually mount the bumper shroud. I'll have to drop what's left of the bull bar (cut the cross bar to accommodate the fairlead rollers) and the front receiver hitch and then remount once the bumper shroud is in place. With the 2" body lift, it will still be necessary to notch out a roughly 11" wide portion at the bottom of the bumper. Here's how she stands as of now:
My former shop instructor recommended BMG metals as a place where I could pick up some bent plate or stock angle and have it cut to size. I went in looking for 5/16" bent plate as I was looking for a 7"x7" dimension. When I got there, the guy offered me 3/8" at the 5/16" price. I took it. Cost roughly $35 bucks for the two pieces. I spent that much on the Badlands Universal Winch Channel which came prepped with some mounting holes and a paint finish.
I had been driving around to the jobsite without my bumper shroud or crash bumper for maybe 2 weeks. The iron workers noticed and asked if I'd been in a wreck. I explained I had taken everything off so I could measure dimensions and devise a way of mounting this stuff to the truck. Then I was going to go to the shop at GW and use the welding rig there as I haven't set up my shielding gas setup at home for welding thicker metal. They said if I tacked it all up, they'd set me up with the full depth welds. Dunzo!
I went home and drilled the holes in the angle I had purchased. It turned out that the 7" wasn't sufficient height on the vertical to catch the stock mounting location. The problem was that once I set the channel on top of the angle, the bend in the channel would not have allowed the lower bolt to snug properly against the vertical face. Thus I needed to cheat the whole setup down by another inch, which then didn't allow for enough clearance to drill a hole for the upper stock mounting bolt. The frame rail horns had an unused hole in the end cap plate. I fed my fish tape through this hole and out of an opening in the side of the frame. I taped a bolt and washer to the fish tape, and pulled the bolt and washer back through this opening to make a stud to which I could tighten a bolt to snug up a new upper mounting position. Once in place, I tack welded the channel to the angles and left everything bolted to the frame and drove to work.

Back from work, I welded the two pieces of scrap unistrut to provide a point to which I could bolt the bumper shroud to. I may have made these too short as I've now added a 2" lift to the truck. This was before I was contemplating the lift. I'll find out this weekend when I do a test fit of the bumper shroud.
The iron workers recommended a galvanizing coating to apply to all of the welds to cut down on rusting. It is a very thick, rich coating. It sets up pretty quickly and readily receives follow on coats of your preferred finish coating. For me, it is generally Rustoleum. I think here I used their high heat formula for grills and such. Otherwise I go with the Hammered finish which is also pretty durable.
The picture above shows the fish tape entering that random hole in the front of the frame rail horn and exiting out of the side hole. In my hand is where I've taped the bolt and washer to the fish tape to pull back through.
Above is my truck sans shroud. I have the sacrificial bull bar on there to qualify as a 'bumper' just in case law enforcement has an issue with my work in progress.
9/8/12
I finished it. Here are the final pics and descriptions.
Above is a shot of what I did to replace this tie bar for the outer 'wing' of the bumper shroud. I used a turn buckle, some extra all-thread, and a connector piece to make an adjustable tie bar. These two are under some stress due to the 2" lift. I also could not reuse the lower vertical holes which is where the stock bar mounted to. Fortunately, on the body mount bracket, there was already a hole conveniently drilled. Using that location helped push the ends of the bumper back up to the fiberglass body panel.
This is a shot of what I did for the lower bumper mount. I found where this lower portion of the shroud would contact the winch channel/mounting bracket, marked the location and drilled it so that these two points (one on either side) could be through-bolted.
Originally, I had welded this unistrut to the the mounting brackets based on the height of the stock truck body. I had intended to use the upper hole on the stock bumper bracket. With the body 2"' higher, that hole was out of reach of the unistrut. Instead, I took some angle iron and machined it to make my connections here as shown.
There's about a 1/2" gap between the bumper and the fiberglass body panel. I don't mind it. Many of the offroad bumpers have this purportedly to allow for any flexing of the frame while wheeling such that the bumper doesn't encroach upon and damage the fiberglass body panel. I'll buy that and sell it just the same here. ;)
Here is just the bumper without the plastic fascia. I had been test-fitting the shroud over and over again to mockup various connection points. On what I thought was going to be the last test fit, I decided I would go ahead and resurrect the fascia and mock up the combined shroud and fascia so I could just start finalizing connections. Well the bumper went from "just about there" to "nowhere near" fitting. I took the fascia back off after failing to force everything in place. It was clear that getting the fascia on was going to require a bit more of a hack job on the plastic.

I had initially been concerned because, due to the body lift, the lower Winch C-Channel was no longer going to be swallowed by the bumper shroud. I then approached tucking the bumper just above the C-channel, but I didn't like what appeared to me to be an unsightly gap. I hadn't planned on reusing the plastic fascia piece, but as I do not really throw away anything, it was still in the garage. I trimmed the lower portions of the fascia off and just tucked the remaining portion up and into the gap between the bumper shroud and the C-Channel. I actually LIKED the result. Outcome appeared relatively neat...at least by my standards.

Next step was adding back the bull bar and front receiver hitch. So the bull bar was bought because I'm a city boy and knew nothing at the time of how futile adding one to a truck is. You're not going to bull anything with it. But I paid good money for it and no one else was going to pay me close to what I paid; so, I decided to keep it. The front receiver hitch came after I realized that even a little truck like mine could be equipped with a winch. My dilemma at the time was that both the receiver hitch and the bull bar occupy the same mounting location (where the stock toe hook gets mounted). I was able to find a way to mount them both which I was pretty proud of. (They're partially welded together at their respective brackets). Now I wanted to keep the front receiver since, with the removal of the stock crash bar, I didn't really have any other substantial steel cross-member at the front of the truck. And I've gotten used to seeing what remains of the bull bar; so, I guess that stays too.

The plastic fascia actually blocked the holes on the fairlead where I had previously mounted my cheap-O offroad lights. What is a budget builder to do without his cheap-O offroad lights? Well, I had two other relocation brackets left over from the body lift kit. (Again, I don't throw away anything). I mounted those to the lower holes of the fairlead roller body, reamed out the pre-drilled hole to accept the 5/16 allthread post of the lights, and voila. They're back in the equation.
I think it came together nicely.
I still want to get the OEM foglight kit. I think the lights are overpriced, but I really like the replacement stem for the steering column. Not sure that's worth the $250 price tag, but I'm hoping someone really loves me and picks that up for my birthday or something.
Other than that, this is pretty much what it took to tuck my winch in behind the stock bumper.
Why not get a real bumper?!
Well, this is my daily driver and I'd like to keep the weight down. Well, "down" given what I've already weighted her down with. A lot of this work, guys undertake to customize the look and feel of their ride. But when it comes to bumpers, almost all of the heavier duty, 3/16" steel offroad bumpers look the same with similar, boxy geometry. The only variations are probably the ARB bumpers and what some guys do stylistically with the addition of stinger bars, hoops, and the like. I might be one of a handful of guys with a winch running the stock bumper. I think I like the novelty of that.


Been trying to find something like this for a long while. Where did you attach it to? I was thinking either the lower bolt holes where the recovery hook is or where a front hitch mount bolts up to. Also,do you have picture(s) of your project?
ReplyDeleteI added a comment to the page that you can check out. I'll add a few pics now and complete the narrative once I actually hide the winch with the bumper shroud.
Delete-will
Hey Randall,
ReplyDeleteI'm almost ready to 'hide' the winch for the hidden winch. I'll add the complete photo journal once I mount the bumper shroud. I had hoped to do it over Labor Day weekend, but the wife sprung a trip to see her folks on me and I only had time to get the snorkel and body lift on.
To your questions, I removed the stock 'crash bumper' which is directly behind the chrome or plastic shroud. There are two bolt holes on either side. Most of the 3/16" offroad steel winch bumpers anchor into these points and are also partially supported from beneath by the replacement radiator skids that come with those kits. I had tried the approach of the Front Receiver Hitch (which I still have mounted) but found that it caused my winch and mounting plate to sit way too low and far out (even with a 2" suspension lift) that pretty much eliminated any approach angle. I like the idea of putting back on the stock chrome bumper. It will do virtually nothing for me in terms of incidental impact while offroading, but it has some appeal to me to not look exactly like every other rig on a trail. The process is a bit involved though. Budget was a factor for me. The custom bumpers are expensive to buy, are made in places far from me, and would have crazy shipping fees. So this was almost necessity. I'll add some detailed specs of what I did and used once finished. Maybe about a week or so out. Thanks for stopping by.
-will
Thanks for the reply Will.same thing for budget here,I just got my frontier.I was coming from a Hummer H3.It was a lot more friendly to bolt on applications.I had a front winch shelf that bolted to the front two recovery points. Simple and no modifications to the vehicle,still kept the approach angle.I saw how they do hidden winches on the Tacomas and 4runners,where I got my idea.I guess my next stop is to find the metal, I was thinking of using C channel iron for the winch plate,may just go with the ease of a pre-fab winch plate. I will be following your thread closely,thanks for the updates and write up. Interested in how everything finally comes together.
ReplyDeleteThe Badlands universal winch channel is a pretty good buy. Picked it up from Harbor Freight for about $35 which is a steal. Best of luck. Hoping to finish it off on either Saturday or Sunday.
DeleteGreat write up and work. Really nice looking end product. Why did you have to relocate some of the bumper mounts? Was it due to the lift you installed or the winch plate was in the way?
ReplyDeleteHey Randall,
ReplyDeleteYou'll have to forgive me if I end up not using all of the correct terminology. I consider the chrome part of the bumper assembly 'the shroud' and then the actual structural component I have been calling either the 'crash bumper' or 'crash bar'. The two mate up via one bracket which is bolted to the top of the shroud and two other brackets (one of which is welded and the other is bolted) which are affixed to the crash bar. Unfortunately, the crash bar was right in the ideal spot for where I wanted to mount the winch. It had to go. Along with it, though, went the two brackets which sandwich the third one that is attached to the shroud. So without the crash bar in place, I had to find some other way of connecting the shroud to the winch mounting plate. The work of making the connection was further complicated by the timing of when I decided to add the body lift. The body lift helped in a way though, as I had much more clearance to be able to fit everything into place. Well, the two inches felt like much more anyway.
That's really a good buy. We at Adair offer ARGO Winch Mount Kit with Conquest Winch Mounting Kit at just $ 262.42 and many other products.
ReplyDeleteNice blog. thanks for your help and such a kind of information. Find out best deal on Frontier Suspension Lift parts & accessories at 4x4parts.com
ReplyDeleteQuality Nissan xterra suspension lift kits at great price, and easy install. I am very pleased with this product.
ReplyDelete