Well, I've been trying since before Shoe Creek to get my act together and fab up some rock sliders. I did succeed in getting the metal. In this post, you'll see that I've managed to bend some metal. I started to type "succeeded in bending some metal", but that would indicate success as if I had achieved a flawless outcome. "Flawless" they are not, but functional is my intent. I also picked up another spare set of steel wheels which took me out to the Eastern Shore of MD which I was able to schedule to coincide with a trip up to Philly to visit the Mrs. I need a solid few weekends where I can machine some stuff, but that would also cause me to potentially miss some viable chances to wheel. So given that my production capacity is limited due to my wheeling opportunities increasing, this update also covers me biting the bullet and ordering a rear diff skid plate since my differential housing has been nicked a bit here and there. But what's a good post without photos?!

First thing I started with was cutting down the actual rails to the approximate size desired. I recall cutting them down to 7 foot even. I'll double check
I then decided I wanted 7" long sections to serve as the outriggers to offset the rails from the frames so that they would end roughly centered along the rocker panels. Normally, I would measure and cut each item. I decided that I wanted to experiment with pulling the same consistent measurement from the factory-cut end and make the same cut along each face of the square tube so that I was only handling the tube a total of four times to cut all 6 pieces out. This required using clamps to secure the workpiece to another section of tubing.
Came out pretty consistent excepting for one outlier that was maybe 1/8"-3/16" taller.
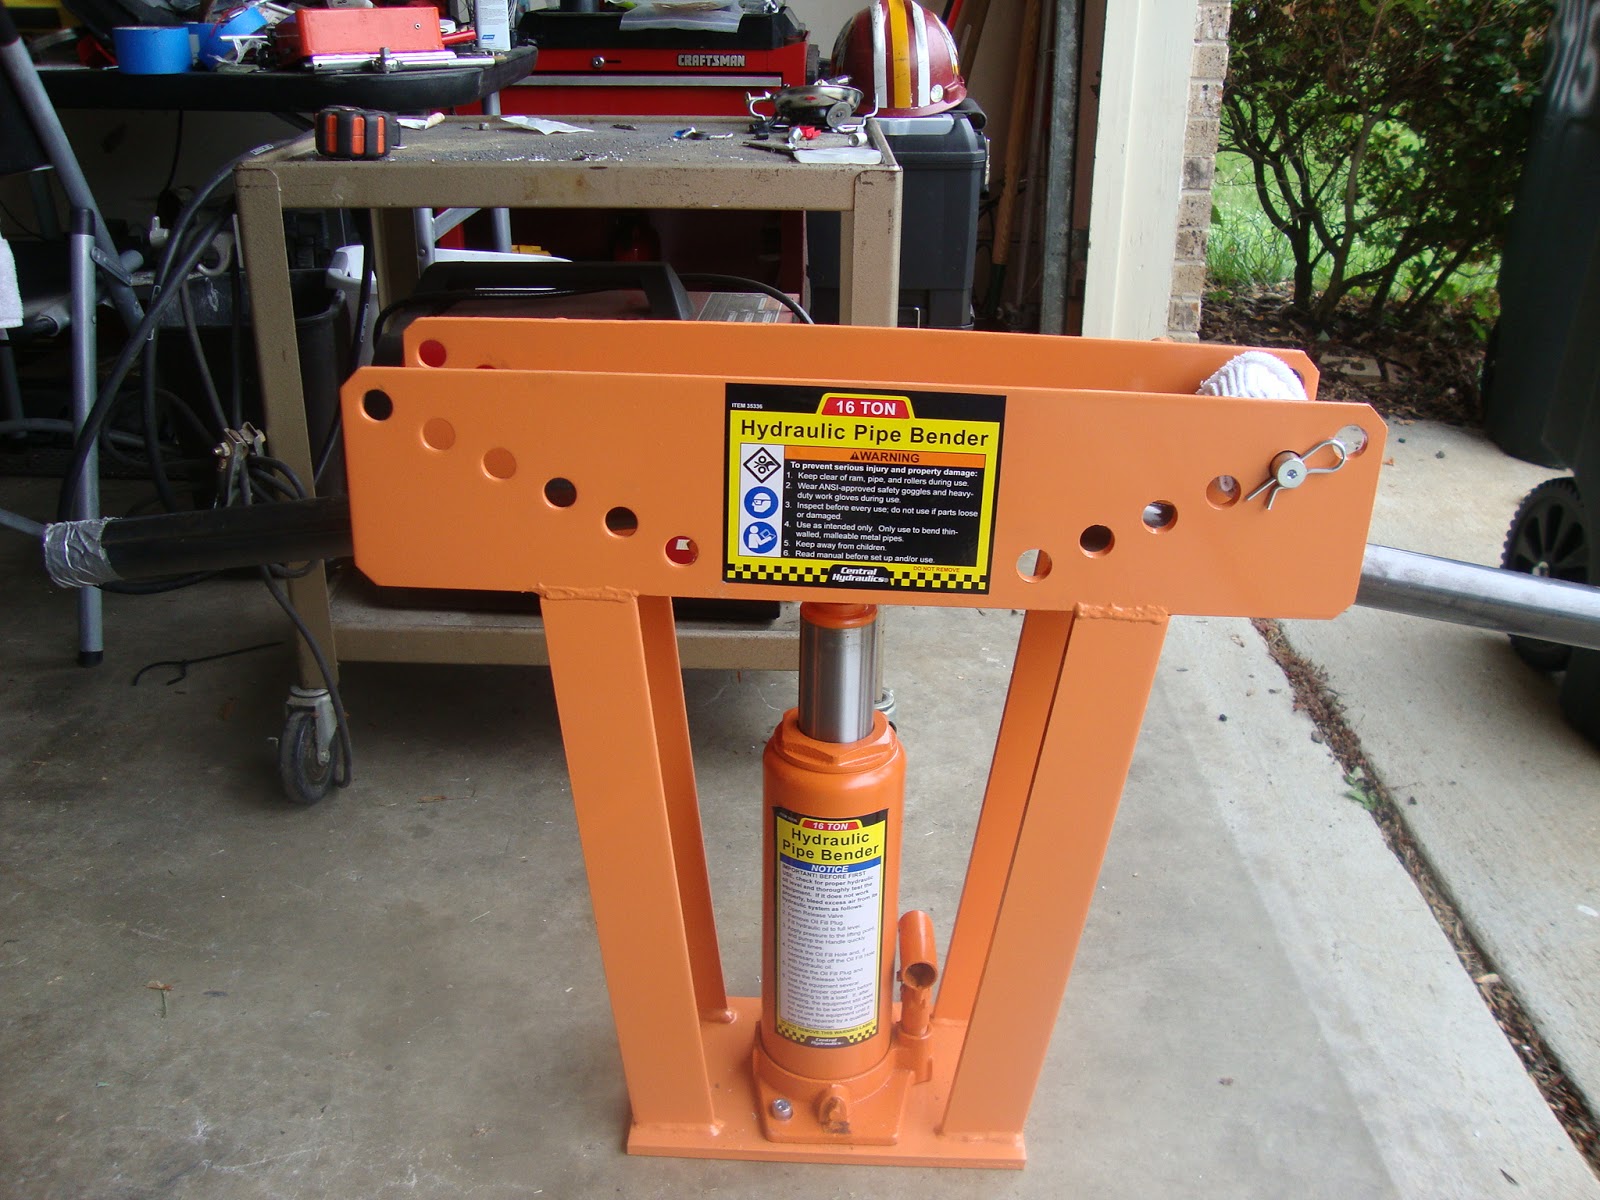
Now a pipe bender is not the tool of choice for what I was attempting. However, this pipe bender cost about $200 bucks whereas a professional grade tubing bender starts at about $2,000 or so. Before even taking on this project, I read tons of blogs and forums on how a pipe bender might as well be considered a 'tube kinker' when used in these sorts of applications. There were also, however, folks whose dogged determination and incredible skill resulted in some very well executed builds despite the shortcomings. I was not quite as fortunate, but I wanted to try nonetheless. One of the recommendations is to fill the pipe with sand. I was starting with a section 11 feet long. So how does one get sand 11 feet up in the air to pour down into a pipe? You need not go that high. This is my little setup using my front porch.
Well, it is bending...
This was about as close to 90 deg as I could get this diameter of pipe to bend
The two pics above show where I kinked the pipe. Fortunately, the more severe of the two indentations made by the rollers is beyond where I plan on making my angled cut to weld the step portion to the square rail. I tried cutting sections of a sock and placing them over the rollers to lessen the effect of metal-on-metal contact to lead to kinks, but that may have had opposite of the intended effect. The added friction may have actually kept the rollers from rolling enough to distribute the force effectively. Once again, trying to do too much and probably made matters worse. Typical.


The next two pics above show that I was successful at least in getting consistency in where the contours occur and replicating the same angle of bend. On the second one, I rushed the process a bit. It was a combination perhaps of extra confidence once my Dad arrived and then also rushing a bit as it was starting to get late and it was a work night. I didn't want to keep my Dad out unnecessarily late for something he had not planned on witnessing. I generally call him when there is a potential for me to be a danger to myself. He encourages the practice. Not the practice of me endangering myself...although I'm sure he has resigned himself to the fact that this is a given. I am thus encouraged to at least call.

Segue a few days later and I was headed out to Kent Island to meet a fellow enthusiast hailing from Chestertown, MD. I was prepared to make the full trip out that way. I dated a girl that went to school there many many moons ago. Probably not a good story to get into given the Mrs. and all. Anyway, S-Bug (forum name) actually suggested a half-way point which was really cool of him. I had mentioned I was familiar with the drive at the time of my responding to the CL post. Anyway, his latest Frontier is a '12 model; so, newer than mine. And purty. I think he said he's got a spacer up front and either shackles or blocks in the rear. He's also got some good tires, although this pic doesn't' quite do it justice. We talked about mods and the need to get more Frontier guys organized for wheeling. He previously had an '08 which is how he had the extra wheels/rims available.
I got the first set really only intending to track down a single rim to mount a second spare onto. I ended up getting a set of four for what I was looking to pay for a single. S-Bug offered essentially the same deal, which I again could not pass up. Please monitor me to ensure I do not become a hoarder.
Well, what I was left with after the first transaction was two spares, and then three random rims. It was not enough rims to mount my stock tires on. So then I wanted to find one more rim to swap my second spare onto so that I could make the second set of rims whole and mount the tires.
Now what I think I'll do is get a set of M/Ts in 285/75/16 in a few months and then have the Nittos and the BFGs to alternate between periodically.
I tried to get some pictures of the Bay Bridge. It is pretty impressive. As a kid I used to be a bit afraid of it.
I took 301 North up to Delaware and then connected onto 95 about 8 miles south of the 495 interchange I normally take on the way into PA. I didn't think had previously gotten a Delaware sign; so, I got one with Veronica. She has her own album in the works.
The last time I was on a long drive, I really wanted some Dairy Queen. And soon as I had that thought, I passed what turned out to be the last one as I got closer in to home. I was sure I would run into another but it never came to be. So this time as I was headed out, I looked for a good spot to stop.
Fast forward a couple more days to today when my box arrived with the rear diff skid.
It looks kind of like a Klingon Warbird. My inner "Trekie" is a bit malnourished. Maybe it is Bird of Prey. I can't remember what the Klingon warships were called and it would be cheating to look it up and then editorialize. I challenge you, if you know the correct nomenclature, to actually post a comment in the Comment Section providing the correction.
So, although I'm not necessarily that guy that will "write a letter", I did observe when I put it down on the ground for a photo that it appeared to be quite asymmetrical.
And the outrigger/stirrups didn't seem to be in quite the same plane either. Before I started to assail someone else's craftsmanship, I thought back immediately to my struggles with bending the pipe. I also had to acknowledge that I had no other viable means of accomplishing the bends myself short of welding together angled sections of plate...and we all know my welds can be hit or miss. So I decided to relax, considering this is a feature that isn't generally visible and is intended to take unexpected bumps and beatings along the trail anyway.

Well, if I had any words of dissent, I would have surely needed to eat them once I went to test fit this thing. It fit pretty much like a glove. My only criticisms/recommendations would have been 1) to furnish four additional lock washers for the lower axle mounts. The forward two bolt locations were furnished with lock washers whereas the aft/lower U-bolt mounts weren't. I happened to have 4 on hand, and then I realized most anyone doing this sort of thing with their truck is likely to have lock-washers or perhaps lock nuts on hand and would just make due; and, finally, 2) I may have considered furnishing an additional contoured U brace so that the U bolt could be inverted. My rationale for this would be so that the nuts and extra threads are up above the axle. As I learned with my DIY skid, anytime you have a bolt and extra threads hanging down, you can be well assured that at least one of them will meet a rock...violently. If I had another one of those contoured U pieces, I'd have accomplished the flip flop now, but lacking such, the flat portion of the outrigger/wing portion would not have mated appropriately with the curve of the axle.

I enclosed a few more pictures so that folks can see some of the detail of how it fits into place.
Having this in place does not alleviate one from applying the principle of attempting to place a wheel on any high spots on the trail instead of trying to straddle. The difficulty I encountered down at Shoe Creek was that the trail was, in many places, only as wide as my rig and there were pronounced rocks, boulders and the like nearly dead center of the trail. It was either take the brunt of it or go toppling over the side of a precipitous drop-off into said creek. Fortunately, my diff only had minor abrasions from my prior forays wheeling. However, with as many outings as I've been sizing up over the next few months, it seemed like a worthwhile investment to spend about $135 to offer a bit more protection to the drivetrain.
That's about all I've got for this update. I've got a few irons in the fire to tend to.
-MANIMAL


No comments:
Post a Comment
Hey! Let me know what you thought of the post or how you came to stumble on this little corner of what we call, "the interwebs". Thanks for stopping by and leaving a comment.
-will